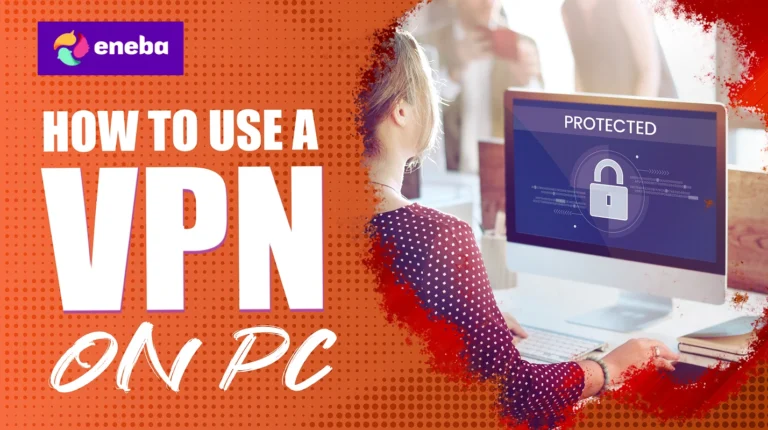
How to Use a VPN on PC: My Complete Setup Guide for 2026
Eneba Hub contains affiliate links, which means we may earn a small commission if you make a purchase through them—at no extra cost to you. Learn more
Learning how to use a VPN on PC opens up a world of possibilities – from accessing geo-blocked content to securing your connection on sketchy networks. Fortunately, the setup takes just a few minutes, regardless of your technical skill level. The challenge is knowing which method suits your needs and how to optimize everything once it’s running.
In this guide, I’ll walk you through every setup method for Windows, explain which protocols matter when, and show you how to fine-tune your VPN for gaming, streaming, and everyday browsing. Whatever you’re looking for in your VPN, I’ve got you covered.
Jump to:
Why Use a VPN on Your PC?

Your PC handles more sensitive data than any other device you own. Banking logins, work documents, private communications, shopping transactions – it all flows through your internet connection. Without encryption, your ISP sees everything. So does anyone else positioned to intercept your traffic.
A VPN creates an encrypted tunnel between your PC and the internet. Your data gets scrambled before leaving your machine, travels through secure servers, and only becomes readable at the destination. Even if someone intercepts the traffic mid-route, they see gibberish instead of your actual data.
Beyond security, VPNs solve practical problems. Streaming libraries vary by country – Netflix US offers different content than Netflix UK. A VPN lets you virtually relocate, accessing whatever regional library you want. If you’re serious about unlocking international catalogs, a solid streaming VPN makes all the difference.
Gaming benefits as well. Some game servers are region-locked. Certain titles launch earlier in specific countries. Competitive players face DDoS attacks from sore losers. A VPN addresses all of these issues while potentially improving routing efficiency for faster connections.
Price discrimination is another consideration. Airlines, hotels, and online retailers sometimes charge different prices based on your location. A VPN lets you comparison shop from various virtual locations, potentially saving real money on purchases. Just check my guide on how to get cheap Steam games with a VPN, and you’ll see what I’m talking about.
Method 1: Using a VPN App (Easiest Approach)

The fastest way to get protected is through a dedicated VPN application. Every major provider offers Windows software that handles configuration automatically. Here’s the process:
Step 1: Choose and Download a VPN App
Visit your preferred VPN provider’s website and download their Windows client. NordVPN, Surfshark, and ExpressVPN all offer polished desktop clients with intuitive interfaces. For beginners, I recommend NordVPN – it strikes the best balance between powerful features and user-friendliness.
Step 2: Install the Application
Run the downloaded installer and follow the prompts. Most VPN installers are simple – accept the terms, choose a location (or stick with the default), and let it finish. The process typically takes under a minute.
Some VPNs install a TAP adapter during setup – this is normal. It’s a virtual network interface that the VPN uses to route your traffic. Windows might ask for administrator permission; grant it.
Step 3: Sign in to Your Account
Launch the app and enter your credentials. If you’re new to the service, you’ll need to create an account first – usually through their website. Most providers offer the same subscription across all platforms, so existing mobile users can sign in with the same account.
Step 4: Connect to a Server
Your VPN client’s homescreen typically has a prominent connect button. Click it to automatically connect to the fastest available server (usually in your country). Alternatively, browse the server list to choose a specific country or city – essential when you need an IP address from a particular location.
Once connected, you’ll usually see a status indicator confirming the active connection, your new IP address, and the server location.
Step 5: Verify Your Connection
Open your browser and search “what is my IP” to confirm everything works. The displayed IP address should match your VPN server’s location, not your actual one. If you see your real location, something’s wrong – try reconnecting or switching servers.
I always run a quick DNS leak test after connecting to a new server. Search “DNS leak test” and run one of the free online tools. If the results show your ISP’s DNS servers instead of the VPN’s, you have a leak that needs fixing in your app’s settings.
Method 2: Manual Windows Configuration

Windows has built-in VPN support, which lets you configure connections without third-party software. This method works with IKEv2 and L2TP/IPsec protocols – you’ll need server details from your VPN provider.
Step 1: Open VPN Settings
Click the Start menu, then Settings > Network & Internet > VPN. On Windows 11, you can also search “VPN settings” directly.
Step 2: Add a VPN Connection
Click “Add a VPN connection” (Windows 10) or “Add VPN” (Windows 11).
Step 3: Enter Connection Details
Fill in the required fields:
- VPN provider: Select “Windows (built-in)”
- Connection name: Something recognizable (e.g., “NordVPN US Server”)
- Server name or address: The server address from your provider
- VPN type: Choose IKEv2 or L2TP/IPsec (check your provider’s documentation)
- Type of sign-in info: Usually “Username and password”
- Username: Your VPN account username
- Password: Your VPN account password
Step 4: Save and Connect
Click “Save” to store the configuration. Back in the VPN settings, click on your new connection and hit “Connect.”
Manual configuration works but lacks features like automatic server switching, kill switches, and split tunneling. I only recommend this approach if you specifically need to avoid installing software or your provider doesn’t offer a Windows app.
Method 3: OpenVPN Manual Setup

For maximum control, you can configure OpenVPN manually using the open-source OpenVPN client. This method requires more effort but offers extensive customization options.
Step 1: Download OpenVPN
Visit openvpn.net and download the OpenVPN Connect client or the community edition. Install it like any other Windows application.
Step 2: Get Configuration Files
Download .ovpn configuration files from your VPN provider. These contain all the server settings, certificates, and connection parameters. Most providers offer these in their account dashboard or support documentation.
Step 3: Import the Configuration
Open OpenVPN, click the import option, and select your downloaded .ovpn file. You can import multiple files for different server locations.
Step 4: Connect
Select your imported profile and click connect. Enter your VPN credentials when prompted. OpenVPN will establish the connection using the settings from your configuration file.
This method works for advanced users who want granular control over their VPN behavior. For everyone else, the native app approach is simpler and offers the same protection.
Method 4: Browser Extensions

If you only need VPN protection for web browsing, browser extensions offer a lightweight alternative. NordVPN and Surfshark both provide standalone extensions for Chrome, Firefox, and Edge that work independently. ExpressVPN also offers extensions for these browsers, but theirs requires the desktop app to be installed first – the extension acts as a remote control for the main application.
Browser VPN extensions only encrypt traffic from that specific browser – other applications remain unprotected. This is a feature, not a bug. You might want your gaming traffic to go direct while your browsing stays private.
Installation is simple: visit your browser’s extension store, search for your VPN provider, install, and sign in. The extension adds a toolbar icon for quick connect/disconnect access.
I use browser extensions alongside my main VPN app for split-tunneling flexibility. Sometimes I want certain browsers protected while others run on my regular connection – extensions make this easy.
Choosing the Right VPN Protocol
Protocols determine how your VPN encrypts and transmits data. Different protocols offer different trade-offs between speed, security, and compatibility. Here’s what I recommend, depending on what you want:
- WireGuard is the modern standard – lightweight, fast, and secure. It uses state-of-the-art cryptography while maintaining excellent performance. For most users, WireGuard should be the default choice. It’s also the best VPN protocol for gaming due to its minimal latency overhead.
- OpenVPN has been the industry workhorse for years. It’s battle-tested, highly configurable, and widely supported. Slightly slower than WireGuard but extremely reliable. Use it when WireGuard isn’t available or you need specific configuration options.
- IKEv2/IPsec offers good speeds and handles network changes well. It’s built into Windows, making it useful for manual configurations. Solid choice when you can’t use WireGuard and OpenVPN for whatever reason.
- L2TP/IPsec is older and slower. Avoid it unless nothing else works with your setup.
Most VPN apps default to WireGuard or their proprietary protocols (like ExpressVPN’s Lightway or NordVPN’s NordLynx, which is WireGuard-based). Stick with the default unless you have specific reasons to change.
Optimizing VPN Performance on PC

VPNs add processing overhead, but smart optimization keeps the impact minimal. Here’s how to get the best performance:
- Select nearby servers. Every mile between you and the VPN server adds latency. For general browsing and security, connect to servers in your country or region. Only use distant servers when you specifically need that location’s IP address. Plus, some VPNs are just faster than others. For more info, check my full guide on the fastest VPNs for gaming.
- Use split tunneling. Most premium VPN apps let you exclude specific applications from the VPN tunnel. Route bandwidth-heavy applications (like game launchers downloading updates) through your regular connection while keeping sensitive traffic protected. This prevents the VPN from bottlenecking activities that don’t need encryption.
- Enable the kill switch. This safety feature blocks all internet traffic if the VPN connection drops unexpectedly. It prevents accidental data exposure during brief disconnects. Every quality VPN app includes this, so make sure it’s enabled.
- Try different protocols. If speeds disappoint, experiment with protocol settings. WireGuard typically offers the best performance, but network conditions vary. Sometimes switching protocols resolves issues with specific ISPs or network configurations.
- Restart the app periodically. Long-running VPN sessions occasionally develop connection quirks. If speeds degrade over time, disconnect and reconnect – this often resolves performance issues.
Using VPN for Streaming on PC
Streaming is one of the most popular VPN use cases. Services like Netflix, Disney+, HBO Max, and BBC iPlayer maintain different content libraries for different regions. A VPN lets you access all of them.
The process is straightforward: connect to a server in your target country, then open the streaming service. The platform sees your VPN’s IP address, assumes you’re in that country, and serves the appropriate library.
Not all VPNs work reliably for streaming, though. Services actively detect and block VPN IP addresses. You need a provider that continuously rotates its infrastructure to stay ahead of blocks. NordVPN and ExpressVPN excel here – they maintain dedicated streaming-optimized servers that reliably bypass detection.
For UK content like BBC iPlayer, connect to a British server. For US Netflix originals not available elsewhere, use an American server. Japanese anime libraries? Connect to Tokyo. The content world opens up once you’re not limited to your physical location.
Extra tip: If a streaming service detects your VPN, try these fixes: switch to a different server in the same country, clear your browser cookies, or contact your VPN’s support for server recommendations. Quality providers update their streaming servers regularly. For even better online security try out best VPN for dark web.
VPN for Gaming on PC

PC gamers benefit from VPNs in ways that might not be immediately obvious. Beyond the security basics, VPNs solve several gaming-specific problems.
- Reduced ping through better routing – Sometimes your ISP routes gaming traffic inefficiently, bouncing it through unnecessary hops. A VPN can provide a more direct path to game servers, actually reducing latency. This isn’t guaranteed – it depends on your ISP and location – but it’s worth testing if you experience inconsistent ping.
- DDoS protection – Competitive gaming, especially at higher ranks or during tournaments, attracts bad actors who DDoS opponents to force disconnections. Your VPN hides your real IP address, making these attacks nearly impossible. If DDoS attacks concern you, check my list of the best VPNs for DDoS protection.
- Access to region-locked content – Some games release earlier in certain regions. Others have region-specific events, items, or servers. A VPN lets you participate regardless of where you actually live.
- Bypass ISP throttling – Some ISPs deliberately slow gaming traffic during peak hours. Since a VPN encrypts your traffic, your ISP can’t flag it as gaming data, preventing targeted throttling.
For the best gaming experience, connect to a server near your game’s servers (not necessarily near you), use WireGuard protocol for minimal latency, and enable split tunneling to keep game traffic on the VPN while updates download through your regular connection.
Troubleshooting Common Issues
Even reliable VPNs occasionally misbehave. Here’s how to handle the most common problems:
- VPN won’t connect: Check if your internet works without the VPN first. If it does, try a different server – some may be temporarily overloaded or down. Switch protocols if available. Check that your firewall isn’t blocking the VPN application.
- Slow speeds: Connect to a closer server. Switch from OpenVPN to WireGuard if available. Disable any unnecessary VPN features like double VPN or multi-hop routing. Run a speed test without the VPN to establish your baseline – if your regular connection is slow, the VPN can’t help.
- IP address leaking: Enable the kill switch in your VPN settings. Check for DNS leaks using online tools – if found, enable DNS leak protection in your app. Ensure IPv6 leak protection is enabled, as some VPNs handle IPv6 traffic incorrectly.
- Streaming services blocked: Switch to a different server in the same country. Clear browser cookies and cache, then try again. Some VPNs offer dedicated streaming servers – use those if available. Contact customer support for current server recommendations. For reliable BBC iPlayer access, see my guide on the best VPNs for BBC iPlayer.
- Games lagging with VPN: You might be connected to a server far from the game servers. Research where your game’s servers are located and connect to a nearby VPN location. Switch to WireGuard for lower latency. Consider using split tunneling to exclude the game if you don’t specifically need VPN protection for it.
- VPN causing crashes or conflicts: Update your VPN app to the latest version. Temporarily disable other security software to test for conflicts. Reinstall the TAP adapter (available in most VPN apps’ settings). As a last resort, uninstall completely and reinstall fresh.
Best Security Practices for PC VPNs

- Running a VPN is just a part of comprehensive security. These additional practices maximize your protection:
- Always enable the kill switch. This prevents data exposure during unexpected disconnections. Every quality VPN includes this feature – there’s no reason to leave it off.
- Use reputable providers only. Free VPNs often monetize by logging and selling your data – defeating the purpose entirely. Stick with established providers that have undergone independent security audits. The most secure VPNs publish their audit results publicly.
- Keep software updated. VPN apps receive regular security patches. Enable automatic updates or check manually to ensure you’re running the latest version. This applies to your operating system too – Windows updates often include security fixes that complement your VPN protection.
- Verify connections regularly. Don’t assume your VPN is working – verify it. Periodic IP checks and DNS leak tests confirm your traffic is actually protected. Make this a habit, especially after updates or system changes.
- Configure app-specific settings. Review your VPN app’s settings thoroughly. Enable features like DNS leak protection, IPv6 leak protection, and auto-connect on startup. Disable features you don’t need to reduce potential attack surface.
When to Use Your VPN
You don’t necessarily need 24/7 VPN coverage, though some users prefer it. That said, I recommend enabling your VPN in these situations:
- Public WiFi – Coffee shops, airports, hotels, libraries, and any other network you don’t control. These environments are prime targets for traffic interception. Always connect before joining public networks.
- Sensitive activities – Banking, shopping, accessing work systems, or anything involving personal data. The extra encryption layer protects against potential eavesdropping, even on your home network.
- Accessing geo-restricted content – Streaming services, region-locked games, or websites unavailable in your country. Connect to a server in the appropriate region before accessing these services.
- Avoiding ISP tracking – If you’d rather your internet provider not log your browsing history, a VPN prevents that surveillance. Your ISP sees encrypted traffic to VPN servers – nothing more.
- Gaming competitively – Protect yourself from DDoS attacks and potential IP-based harassment. This matters most for streamers and tournament players but benefits anyone in competitive environments.
- Traveling internationally – Access your home country’s services while abroad and protect yourself on foreign networks. If you’re visiting countries with internet censorship like China, you’ll definitely need a VPN – check my list of the best VPNs for China before you go.
Protect Your PC With a Reliable VPN
Setting up a VPN on your PC takes minutes but provides lasting security benefits. The app-based approach works for most users – download, install, connect, done. Advanced users can explore manual configurations, but modern VPN apps have matured to the point where that’s rarely necessary.
What matters most is actually using the protection. The best VPN in the world does nothing if it sits idle. Configure auto-connect for untrusted networks, enable the kill switch, and make VPN usage a part of your routine.
Choose any provider from my list of the best VPNs, install its Windows app, and start protecting your connections today. Your online privacy is worth the effort.
FAQs
Yes, VPNs are legal in most countries. They’re legitimate privacy and security tools used by businesses and individuals worldwide. However, some countries restrict or ban VPN use – notably China, Russia, and the UAE. Check local laws if traveling to restrictive regions.
Yes, to an extent. Encryption processing and server routing add overhead, typically reducing speeds by 10-20% with quality providers and nearby servers. WireGuard protocol minimizes this impact. For most activities, the slowdown is imperceptible.
You can, but I advise against it. Free VPNs typically impose data caps, throttle speeds, and limit server access. Worse, many monetize by logging and selling your browsing data. If budget is a concern, look for affordable paid options.
Yes, because they serve different purposes. Antivirus protects against malware on your device; VPNs protect your internet traffic in transit. Neither replaces the other. For comprehensive security, use both.
Yes, your ISP can see you’re connected to a VPN server and transferring encrypted data, but they can’t see what you’re doing or which websites you’re visiting. Some VPNs offer obfuscation features that disguise VPN traffic as regular HTTPS browsing, hiding even the fact that you’re using a VPN.