How to Clean a Keyboard Without Ruining It

Cleaning a keyboard isn’t glamorous, but it’s one of the easiest ways to keep your setup at peak performance. As someone who spends long hours typing and gaming, I’ve learned that a neglected board can harbour germs and even affect responsiveness.
In this guide, I’ll show you how to clean a keyboard, whether you need a quick tidy or a full overhaul. You’ll learn how to remove dust and debris, safely deep clean the keycaps, and maintain different types of boards. By the end, you’ll have the confidence to keep your favourite peripheral looking brand new.
Jump to:
Quick Fixes: How to Clean a Keyboard Without Taking it Apart
When crumbs and dust start piling up, you don’t always need to tear the keyboard down. A quick clean can restore function and appearance in minutes. And yes, even the best 60% gaming keyboards need regular cleaning. Here’s how to clean a keyboard without disassembling it:
- Unplug and turn it upside down: Always disconnect your keyboard or power off your laptop before cleaning. Hold the board upside down over a trash can and gently shake to dislodge loose debris.
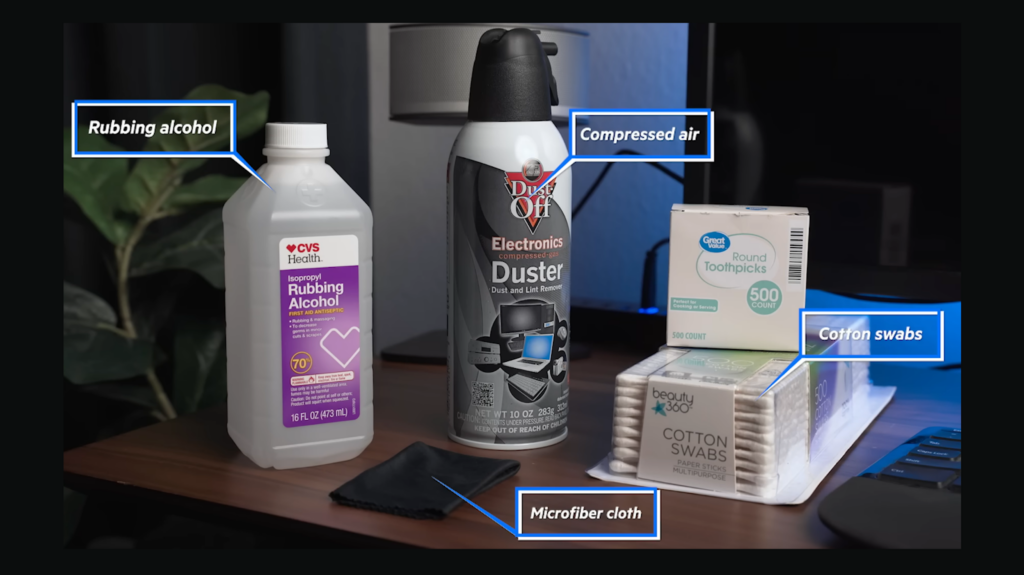
- Use compressed air: A can of compressed air is great for blowing dust and crumbs from between the keys. Keep the can upright and spray in short bursts, moving in a zig‑zag pattern across the board.
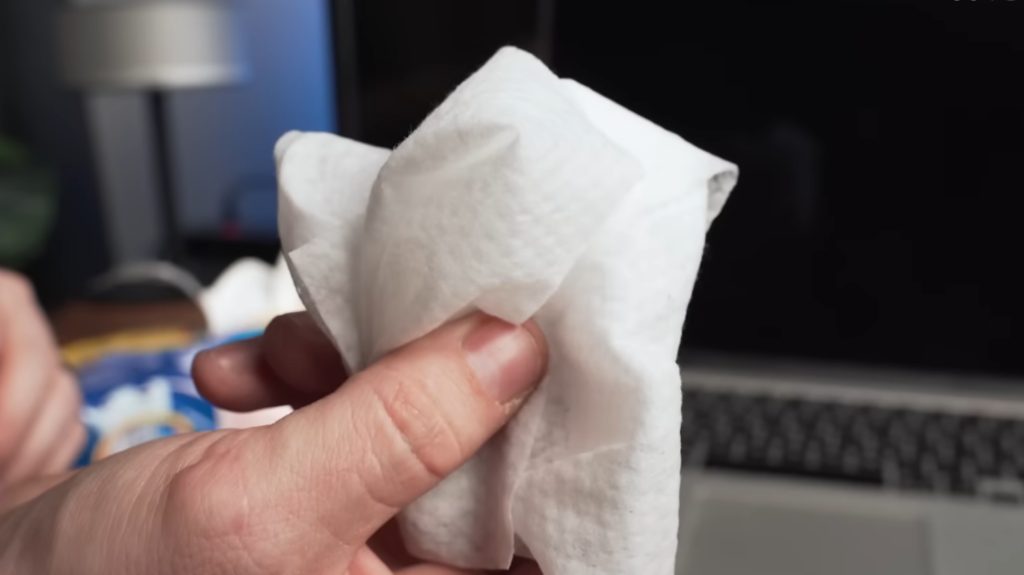
- Wipe with a microfiber cloth: Lightly dampen a microfiber cloth and wipe across the key tops and frame. For greasy spots, use a cloth slightly moistened with isopropyl alcohol. Avoid using harsh cleaners or pouring liquid directly onto the keyboard.
- Clean between the keys: Cotton swabs dipped in rubbing alcohol can reach narrow gaps. Gently run the swab along the sides of each key to loosen grime.
- Use cleaning putty: Gel or putty cleaners lift dust from hard‑to‑reach areas. Press the material onto the surface and peel it away to remove debris.
Following these steps keeps your keyboard sanitary and responsive between deep cleans. For this guide, I tried different approaches on my top-tier Razer keyboard, and it came away looking spotless.
Deep Cleaning: Removing Keycaps and Washing Everything
Sometimes a keyboard needs more than a quick dusting. A thorough clean restores the feel of new switches and removes grime that hides under the keys. Here’s how to clean a keyboard at a deeper level:
- Disconnect and document: Unplug the board and photograph the key layout. This reference helps when reinstalling the caps. Remove any batteries or cables.
- Pull the keycaps: Use a keycap puller to gently lift each cap, starting with a less important key. Wide keys may have stabilisers, so be careful not to bend the bars.
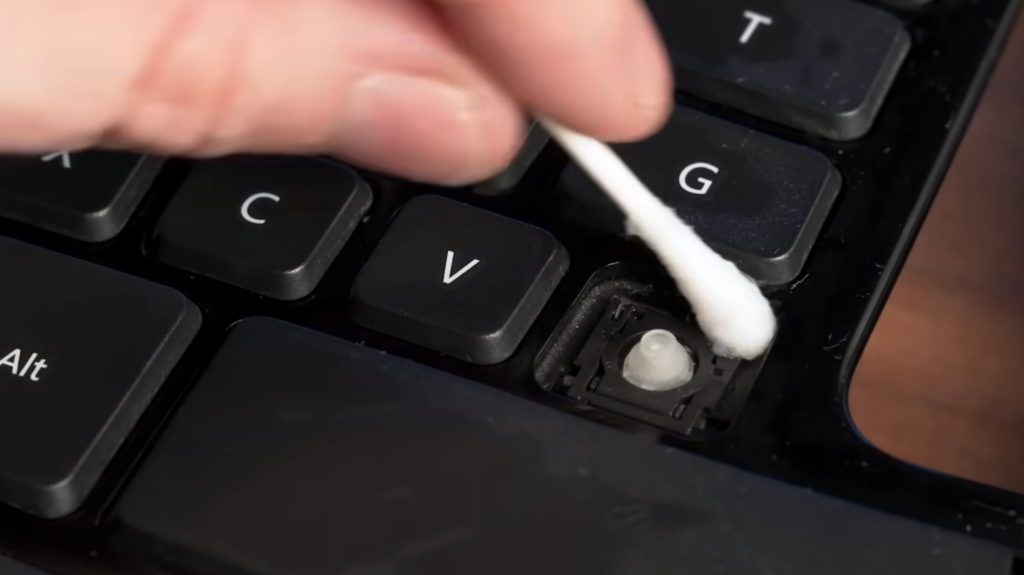
- Clean the board: Blow debris off the plate with compressed air, then wipe around the switches with a swab dipped in alcohol. Avoid getting liquid on the electronics.
- Wash the keycaps: Soak the caps in warm soapy water, then rinse and let them dry on a towel. Avoid boiling water or abrasive cleaners, which can warp plastic.
- Spot clean stubborn stains: When soap and water aren’t enough, use a swab dipped in 70 % alcohol on problem areas. Don’t saturate the legends or low‑quality ABS caps. This goes double for affordable models (yes, even the best budget gaming keyboards).
- Dry thoroughly and reassemble: Let everything dry completely, then press each cap back into place using your reference photo.
Deep cleaning takes time. You don’t want to make any mistakes here, so I recommend taking your time with each step. Once you’re done, though, your board will look brand new, and you’ll get more responsiveness out of it.
Cleaning Different Keyboard Types
Not all keyboards are built the same. Mechanical, membrane, laptop, and wireless boards each have unique considerations. Here’s how I approach each type:
Mechanical Keyboards
Good mechanical keyboards are robust and often allow full disassembly. Unplug the board, pull the caps, clean the plate with compressed air, and wipe around switches with a swab dipped in alcohol. Stubborn keys may need a switch replacement, which is simple on hot‑swappable boards.
Membrane Keyboards
Membrane boards use rubber domes and aren’t built for disassembly. Avoid removing caps and rely on quick cleaning: unplug, shake out debris, blow out dust with compressed air, and wipe with a slightly damp cloth. Use swabs with a bit of alcohol only on stubborn spots, and keep liquids to the minimum. I used some great Corsair keyboards for my testing, and they clean like a dream if you know what you’re doing.
Laptop Keyboards
Laptops integrate the keyboard with the rest of the device. Shut down and unplug the machine before cleaning. Use compressed air to blow out debris and run a lightly dampened swab between keys. Finish with a damp cloth, but avoid excess moisture that could damage internal components.
Wireless Keyboards
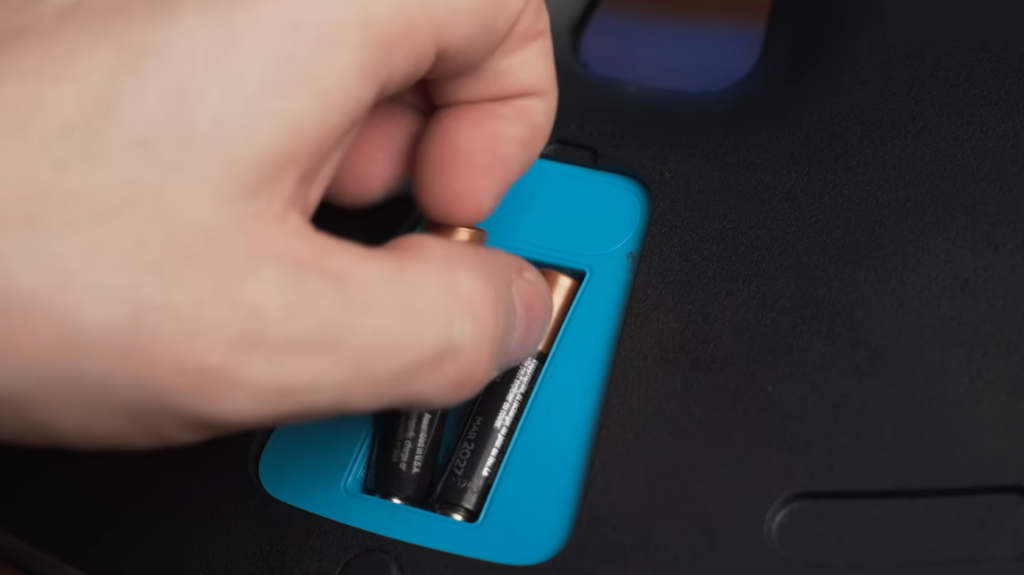
For wireless boards, remove the batteries before cleaning. Otherwise, treat them like wired keyboards: blow out dust, wipe with a damp cloth, and clean between keys with swabs. Dry the battery compartment thoroughly before reinserting batteries.
If you’re in the market for a new board, our guide to the best wireless gaming keyboards offers expert recommendations on performance and durability. Proper cleaning will help whichever model you choose last longer.
Maintenance Tips to Keep Your Keyboard Clean
Deep cleaning doesn’t need to be a weekly ritual. With a few simple habits, you can keep your keyboard cleaner for longer. Here are my favourite strategies:
•Clean regularly: Wipe the keys and frame with a microfiber cloth every week and blow out debris with compressed air each month. Step up the schedule if you share your setup.
•Keep hands and food separate: Wash your hands before typing and avoid eating or drinking over the board. Crumbs and spills cause sticky keys and can damage circuits. Unplug immediately if a spill occurs and let everything dry.
•Cover and store tools: Use a dust cover to protect your keyboard when it’s not in use. Keep a keycap puller, swabs, and compressed air on hand so quick cleanings are easy.
If you’re looking to upgrade your setup, our roundup of the best Logitech keyboards highlights models with durable materials and features that make them easy to clean.
The Bottom Line: A Clean Keyboard Is a Happy Keyboard
Even the best gaming keyboards need regular cleaning. Learning how to do it pays off in both hygiene and performance. A quick shake-and-wipe keeps everyday dust at bay, and an occasional deep clean restores the satisfying feel of fresh switches.
Mechanical, membrane, laptop, and wireless boards each demand different levels of care, but all benefit from routine maintenance. From personal experience, I find that setting aside a bit of time each month to clean my gear makes gaming sessions more enjoyable and extends the life of my peripherals.
FAQs
How do I clean a keyboard without damaging it?
To clean a keyboard without damaging it, unplug the board and gently shake out debris over a trash can. Use compressed air to blow out dust, then wipe with a slightly damp microfiber cloth. Avoid pouring liquid directly onto the keyboard and never use harsh cleaners. Finish by wiping again with a dry cloth.
What’s the best way to clean under keyboard keys?
The best way to clean under keyboard keys is to remove the keycaps with a keycap puller and use compressed air to blow away debris. For stubborn dirt, gently scrub around the switch with a cotton swab dipped in isopropyl alcohol, then let everything dry before reassembling.
Can I use alcohol wipes to clean my keyboard?
Yes, you can use alcohol wipes to clean your keyboard as long as they’re not soaking wet. Lightly wipe the key tops and frame, then follow with a dry microfiber cloth. Avoid using alcohol on printed legends if your caps are made of lower‑quality ABS plastic.
How often should I clean my keyboard?
You should clean your keyboard at least once a month for regular maintenance. Wipe it down weekly if you use it heavily, and perform a deep clean whenever keys feel sticky or sluggish.
Is it safe to remove keyboard keys for cleaning?
Yes, it is safe to remove keyboard keys for cleaning if you use a keycap puller and work carefully. Always disconnect the keyboard first, keep track of the key layout, and handle stabilised keys gently. Once cleaned, allow the caps to dry completely before pressing them back into place.