How to Remove Keyboard Switches: Complete Step-by-Step Guide

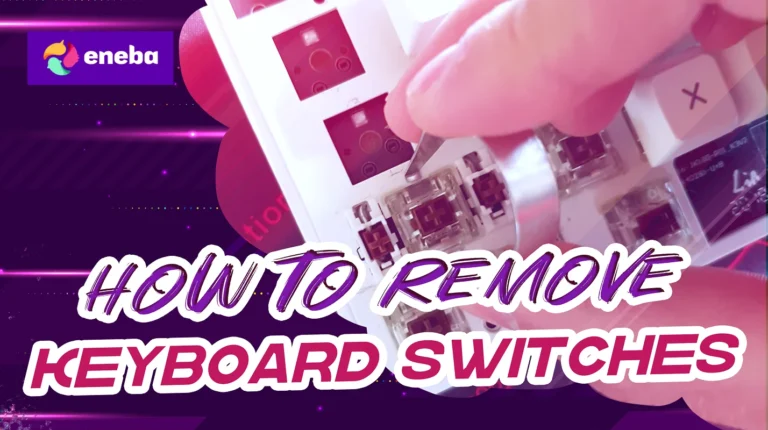
Learning how to remove keyboard switches is essential for customizing, repairing, or maintaining your mechanical keyboard. The process varies depending on whether you have a hot-swappable or soldered board, but both are manageable with the right approach. I’ve swapped switches on dozens of keyboards over the past few years, and once you understand the basics, it becomes surprisingly straightforward.
Removing switches lets you customize your typing experience, replace damaged components, or deep-clean your keyboard without buying a new one. Hot-swappable keyboards make this process beginner-friendly, while soldered switches require desoldering equipment. This guide covers both methods, the necessary tools, and common mistakes to help you confidently modify your mechanical keyboard.
Jump to:
How to Remove Keyboard Switches: Understanding Your Keyboard Type

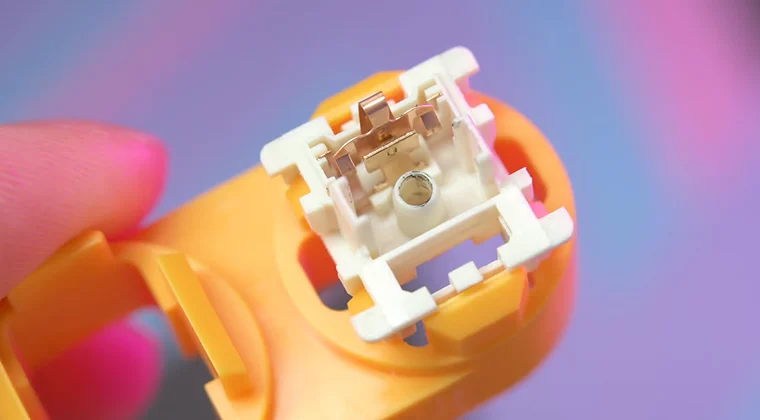
Before removing switches, determine whether your keyboard uses hot-swappable sockets or soldered connections. Hot-swappable keyboards feature sockets that let switches pop in and out without tools beyond a switch puller. Soldered keyboards have switches permanently attached to the PCB with metal solder joints that must be melted.
Check your keyboard’s product specifications for “hot-swappable” capability – most brands clearly advertise this feature. If unsure, remove a keycap and examine the switch. Hot-swap switches sit in visible sockets and wiggle slightly, while soldered switches are flush-mounted with no socket underneath.
Hot-swappable keyboards include enthusiast boards like Keychron Q and V series, GMMK 2, and Drop CTRL. These let you experiment with different switches without technical skills. Our best mechanical keyboards guide covers more hot-swap models across various price ranges.
Soldered keyboards include most older mechanical keyboards, budget models, and some premium boards. Brands like Ducky and Varmilo use soldered construction, requiring desoldering equipment for switch removal.
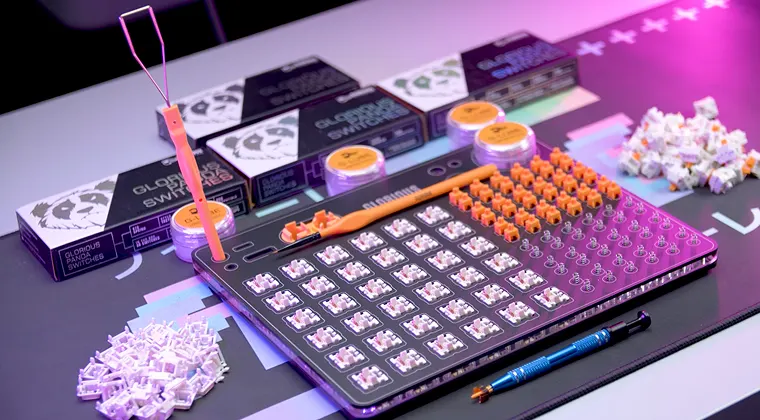
Tools You Need to Remove Keyboard Switches
For hot-swappable keyboards, you only need a switch puller – a small tool designed to grip and extract switches from sockets. Most enthusiast keyboards include one, or purchase separately for $5-$10.
For soldered keyboards, you’ll need:
- Soldering iron (temperature-controlled, 60W+ recommended)
- Desoldering pump or desoldering wick
- Solder sucker as backup
- Helping hands to stabilize the keyboard
- Isopropyl alcohol for cleaning
A keycap puller is essential for both types since you must remove keycaps before accessing switches. Wire pullers work better than plastic ones for avoiding damage.
How to Remove Switches from Hot-Swappable Keyboards

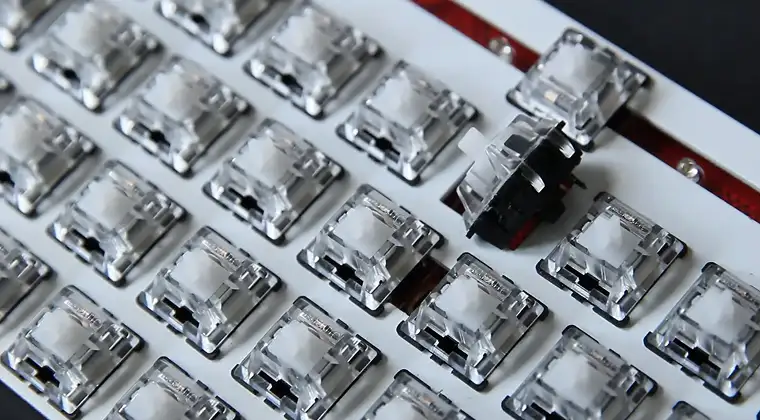
Removing switches from hot-swap keyboards is straightforward. Start by removing all keycaps with a keycap puller – pull straight up to avoid bending stabilizer stems. Set keycaps aside safely.
Step 1: Position your switch puller on the switch. The metal prongs slide into notches on the top and bottom of the switch housing. Align carefully to avoid scratching switches or damaging sockets.
Step 2: Squeeze the handles together firmly while pulling straight up. The switch should release with moderate force. If stuck, wiggle gently side-to-side while pulling upward.
Step 3: Inspect each switch for bent pins after removal. Straighten bent pins with needle-nose pliers before installing switches elsewhere.
Remove switches in sections rather than all at once to avoid mixing up positions if using different types across your board.
The entire process takes 5-10 minutes for a full-size keyboard. Store-removed switches in a container to prevent losing them. Most modern gaming keyboards now include hot-swap functionality, which our best gaming keyboards roundup explores in detail.
How to Remove Mechanical Keyboard Switches from Soldered Boards
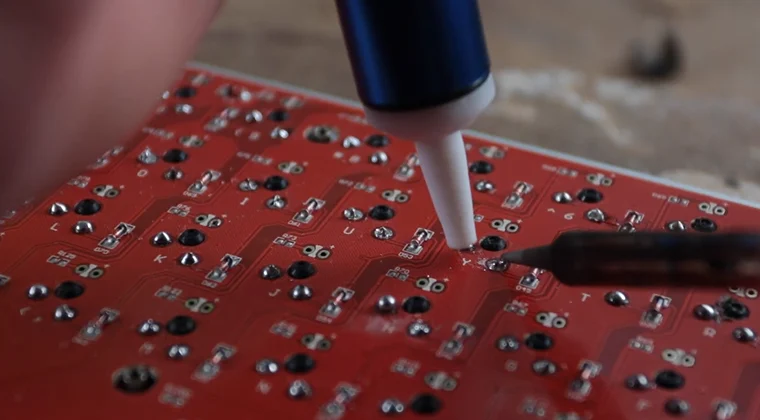
Removing switches from soldered keyboards requires more skill and patience. The process involves melting solder joints holding each switch pin, then extracting the switch once both pins are free. Practice on cheap electronics before attempting this on your primary board.
Preparation: Disconnect your keyboard and remove all keycaps. Place it upside-down with the PCB facing up. Identify the two solder joints for each switch – small metallic mounds where pins protrude through the PCB.
Step 1: Heat your soldering iron to 350°C (660°F). Apply the tip to one solder joint until the solder melts – usually 2-3 seconds. Use a desoldering pump or wick to remove melted solder.
Step 2: Repeat for the second pin. Both pins must be completely clear before the switch releases. Forcing it will rip the copper pad off your PCB.
Step 3: Once desoldered, gently push the switch out from the top while supporting the PCB. If it resists, reheat and remove more solder.
Step 4: Clean each pad with isopropyl alcohol and inspect for damage.
Desoldering a full keyboard takes 1-3 hours, depending on experience. Work slowly – rushing damages PCBs.
How to Change Keyboard Switches: Reinstalling New Switches
After removing old switches, installing new ones follows the reverse process. For hot-swappable keyboards, align switch pins with socket holes and press down firmly until the switch clicks into place. The switch should sit flush without wobbling.
Inspect metal pins before insertion – both must be straight and parallel. Bent pins will miss the socket and potentially damage it. Use pliers to straighten any bent pins.
For soldered installations, place the switch through the plate and PCB, ensuring pins protrude cleanly. Apply fresh solder to each pin, creating smooth, cone-shaped joints that connect the switch to the PCB.
Test your keyboard after installing switches but before replacing keycaps. Use keyboard testing software to verify that every key registers properly.
Common Mistakes When Removing Keyboard Switches
Understanding what can go wrong during switch removal helps you avoid expensive repairs and frustrating setbacks. Here are the most common errors that damage keyboards:
- Forcing stuck switches damages keyboards most commonly. If a switch won’t release, investigate why rather than applying more force. Hot-swap sockets crack under excessive pressure, while soldered switches tear PCB pads when forced.
- Forgetting to remove stabilizers before desoldering larger keys causes problems. Stabilizer bars must be unclipped first, or they’ll prevent switches from coming out.
- Using insufficient heat when desoldering leaves residue that holds switches. Soldering irons below 300°C often fail to fully melt solder.
- Not supporting the PCB during removal can flex and crack the board. Always work on a stable surface.
What to avoid:
- Never pull switches at an angle – always straight up
- Don’t reuse damaged or deformed switches
- Avoid touching soldering tips to plastic housings
- Never force hot-swap switches without verifying pin alignment
Taking your time and following proper techniques prevents nearly all switch removal issues, saving you from costly keyboard replacements.
How to Replace Keyboard Switches: Maintenance Tips
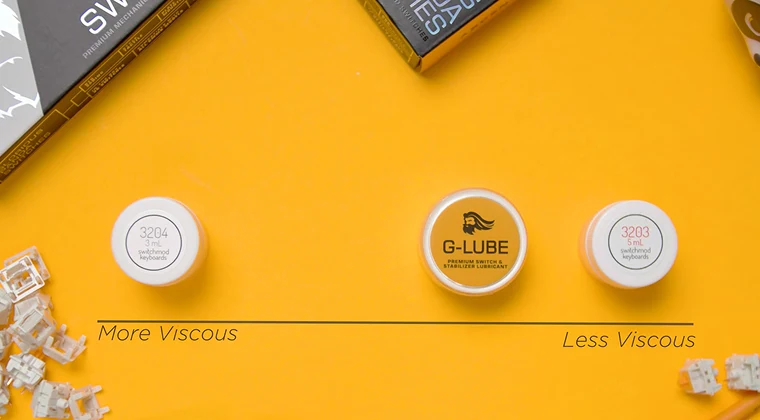
Removing switches provides an opportunity to clean your keyboard’s internals. Use compressed air to blow out dust from the PCB and plate before installing new switches. Wipe the plate with isopropyl alcohol to remove buildup. Lubing switches during replacement improves feel and sound. Apply thin lubricant to the stem and spring before installation for smoother keypresses.
Label removed switches if using multiple types across your keyboard. Small containers or labeled bags keep everything organized. Consider switch films when reassembling for hot-swap keyboards. These thin plastic layers reduce housing wobble and improve sound consistency.
When to Remove and Replace Your Keyboard Switches
Switch failure is the primary reason to replace individual switches. Switches develop chatter (registering multiple keypresses), become mushy, or stop responding after millions of actuations. Replacing faulty switches costs far less than buying a new keyboard.
Customization drives most switch removal among enthusiasts. Experimenting with different types helps you discover preferences. I originally used Cherry MX Browns until testing heavier tactile switches revealed I preferred more pronounced feedback. For portable setups, our best wireless gaming keyboards guide includes hot-swap models perfect for experimenting with different switches on the go.
Keyboard modding often requires removing switches to access the PCB for foam installation or sound-dampening modifications. Deep cleaning becomes necessary when spills, pet hair, or dust accumulate inside your keyboard.
Why Learning Switch Removal Matters for Keyboard Enthusiasts
Mastering switch removal unlocks the full potential of mechanical keyboards by eliminating the need for complete replacements when preferences change. One quality keyboard can serve multiple purposes – gaming switches for competitive sessions, tactile switches for work, and quiet switches for late-night use.
Cost savings add up when you can repair rather than replace. A $300 custom keyboard with one failed switch only needs a $0.50 replacement switch if you can install it yourself.
Skill development in keyboard maintenance builds confidence for advanced modifications. Switch lubing, spring swapping, and stem modifications all require switch removal first.
How switch removal benefits different users:
- Budget-conscious gamers → Upgrade switches on affordable boards from our best budget gaming keyboards guide instead of buying expensive pre-builts
- Touch typists → Test multiple switch types to find the perfect feel for reducing finger fatigue
- Keyboard collectors → Maintain and restore vintage boards
- Content creators → Quickly swap to silent switches when recording audio
Best Practices for Safe Switch Removal
Work in a well-lit environment where you can clearly see switch pins and PCB components. Adequate lighting prevents mistakes that damage your keyboard.
- Take photos before disassembly if concerned about forgetting how things go back together. Photograph stabilizer orientation and switch layouts.
- Ground yourself before touching PCB components to prevent electrostatic discharge damage. Touch a metal object or wear an anti-static wrist strap.
- Keep a clean workspace free of liquids and clutter. Small switch components disappear easily. A white towel provides contrast to spot dropped springs immediately.
Compact layouts like 60% keyboards make switch removal easier with fewer switches to manage, as detailed in our best 60% gaming keyboards guide.
Conclusion
Removing keyboard switches opens endless possibilities for customization, maintenance, and repair that keep your mechanical keyboard performing perfectly for years. Whether working with a beginner-friendly hot-swap board or tackling desoldering challenges, the process becomes routine with practice. I remember being nervous about my first switch removal, but now it’s second nature.
Don’t let uncertainty prevent you from experimenting. Start with hot-swappable boards if you’re new to mechanical keyboards, or invest time learning to desolder if you already own a soldered board you love. The skills you develop translate across all keyboard maintenance.
Ready to start your keyboard customization journey? Browse gaming peripherals on Eneba to find hot-swappable keyboards and switch variety packs at competitive prices. The perfect switches for your typing style are just a few clicks away, and now you have the knowledge to install them yourself.
FAQs
To remove switches from a keyboard, first check if it’s hot-swappable or soldered. Hot-swap boards need only a switch puller to pull switches straight out. Soldered keyboards require desoldering both pins with a soldering iron and pump before extraction.
Yes, you can remove switches without a switch puller using small flathead screwdrivers or tweezers. However, dedicated pullers cost under $10 and prevent socket damage or scratches, making them worth the investment for regular switch removal.
Check your keyboard’s specifications for “hot-swappable” or “hot-swap sockets” listed in features. You can also remove a keycap and examine the switch – hot-swap switches sit in visible sockets and wiggle, while soldered ones are flush to the PCB.
You only need to desolder switches if your keyboard uses soldered connections. Hot-swappable keyboards let you replace switches without soldering by simply pulling out old switches and pressing in new ones, making it beginner-friendly and tool-free.
Yes, improper removal can damage keyboards if you pull at angles, force stuck switches, or use excessive heat. Pulling straight up for hot-swap boards and using proper soldering temperatures prevents damage to sockets, PCBs, and switches during removal.