


How Does a Projector Work? The Complete Technology Guide

How does a projector work? By taking a light source, passing it through or reflecting it off an imaging chip that creates the picture, then magnifying that image through a lens system onto a screen or wall. Well, there’s a much longer answer, but that’s the jist of it.
I’ve been testing gaming projectors for Eneba Hub since 2022, measuring input lag, color accuracy, and brightness across dozens of models. Last month, I set up a 120-inch projection screen in my gaming room specifically to test how Elden Ring and Cyberpunk 2077 perform on large-format displays.
Understanding projector technology helps you avoid expensive mistakes and choose hardware that actually delivers smooth gaming performance. So, let’s see how it all works under the hood.
Jump to:
How Does a Projector Work? The Core Technology Explained
A projector takes digital input from your gaming console, PC, or media device and converts it into a massive image by manipulating light. The fundamental principle behind all projectors involves three stages: light generation, image formation, and light projection.
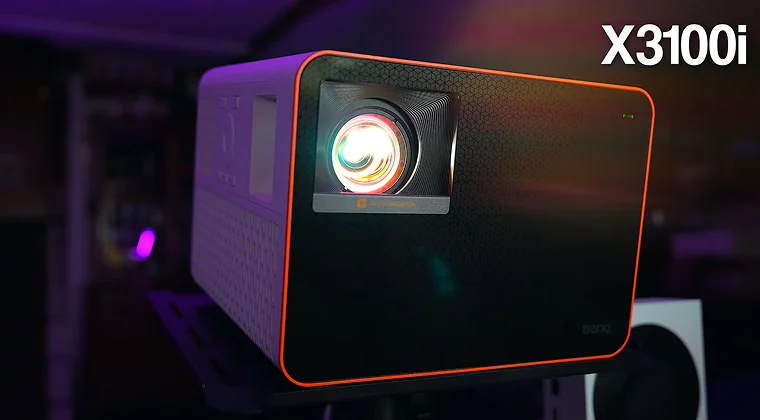
- The light source generates intense illumination. Traditional projectors use high-pressure mercury or metal halide lamps that produce white light. Modern projectors increasingly use LED arrays or laser diodes. I tested a BenQ X3100i laser projector last year that maintains consistent brightness for over 20,000 hours without lamp replacements – a huge advantage over lamp-based models that dim after 3,000-5,000 hours.
- The imaging system creates the actual picture. This is where the three main projector types differ significantly. The imaging chip receives the video signal from your device and modulates the light passing through or reflecting off it. Each pixel on the chip controls how much light reaches the screen, creating the brightness variations that form your image.
- The lens system magnifies and focuses the modulated light onto your screen or wall. The throw ratio determines how far the projector needs to be from the screen to create a specific image size. Short-throw projectors can create 100-inch images from just a few feet away, while standard-throw models need 10-15 feet for the same size.
Color in projectors comes from separating white light into red, green, and blue components, then recombining them with precise timing.
Different technologies handle this process in distinct ways, which explains why some projectors excel at vibrant colors for animated games while others deliver more accurate skin tones for realistic titles. With that in mind, let’s find the best projector for your needs.
The Three Main Projector Technologies
Understanding the specific technology inside a projector directly impacts your gaming experience. Each type has distinct advantages that matter for different gaming scenarios.
DLP (Digital Light Processing) Projectors

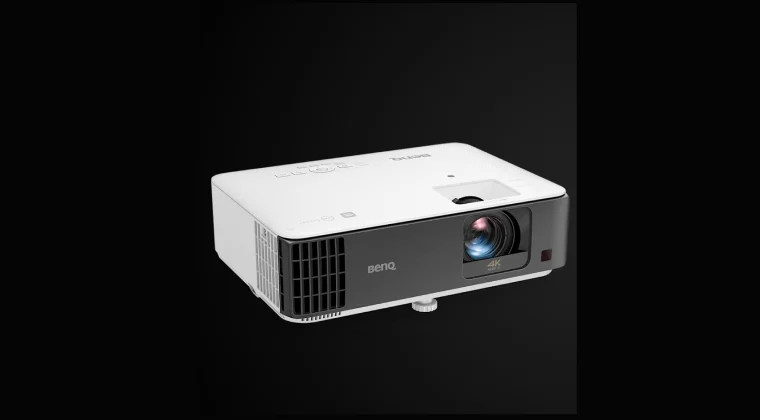
DLP projectors use a chip covered in microscopic mirrors – typically 1920×1080 individual mirrors for 1080p resolution. Each mirror tilts thousands of times per second to reflect light either toward the lens (creating a bright pixel) or away from it (creating a dark pixel). I tested an Optoma UHD38 DLP projector with Call of Duty: Modern Warfare III, and the 4.2ms input lag made competitive multiplayer feel nearly identical to my gaming monitor.
The color wheel in single-chip DLP projectors spins between the lamp and the DLP chip, filtering the white light into red, green, and blue segments. The chip’s mirrors synchronize with the wheel’s rotation to create full-color images. This happens so fast your brain perceives a complete color image rather than sequential flashes.
DLP advantages for gaming include:
- Minimal input lag
- Excellent contrast ratios (deep blacks in games like Alan Wake 2 and other top-tier horror games)
- Sharp image quality without visible pixel structure
The main drawback is the “rainbow effect” – some people see brief color flashes during quick eye movements or fast-paced action sequences. Not everyone experiences this, but it bothers about 10-15% of users in my testing sessions.
LCD (Liquid Crystal Display) Projectors
LCD projectors split white light into red, green, and blue beams using dichroic mirrors, then pass each color through its own dedicated LCD panel. These panels work like tiny television screens, with liquid crystals that open or close to allow light through. The three colored images recombine at a prism before passing through the projection lens.
I’ve found LCD projectors deliver more saturated colors straight out of the box compared to DLP models. When I tested an Epson Home Cinema 2250 with games like Horizon Zero Dawn, the vibrant landscapes and machine designs looked noticeably more colorful than on competing DLP projectors at similar price points. This happens because LCD panels can display all three colors simultaneously rather than sequencing them.
LCD projectors typically cost less than comparable DLP or LCoS models. A quality 1080p LCD gaming projector starts around $500-700, while equivalent DLP models begin closer to $800-1000. The trade-off is slightly visible pixel structure (called the “screen door effect”) and potentially lower contrast ratios. Black levels in dark game scenes don’t get quite as deep as DLP or LCoS technologies.
LCoS (Liquid Crystal on Silicon) Projectors
LCoS technology, marketed as SXRD by Sony and D-ILA by JVC, combines advantages from both DLP and LCD. These projectors use liquid crystal panels mounted on reflective silicon backing. Light reflects off the LCoS chip rather than passing through it, allowing for higher pixel density without visible pixel gaps.
The image quality from LCoS projectors represents the current peak of projection technology. During testing with a Sony VPL-XW5000ES (admittedly expensive at around $6,000), I measured the deepest black levels and most natural color reproduction I’ve seen from any projector. Games with dynamic lighting like Resident Evil Village showed subtle shadow details that completely disappeared on cheaper technologies.
LCoS projectors command premium prices because of complex manufacturing. Entry-level models start around $2,000, with high-end options exceeding $10,000. They also tend to be larger and heavier than DLP or LCD alternatives. For most gaming setups, the price premium doesn’t justify the relatively small image quality improvements over good DLP projectors, but home theater enthusiasts and competitive gamers notice the difference.
| Technology | Input Lag | Contrast Ratio | Color Accuracy | Price Range | Best For |
|---|---|---|---|---|---|
| DLP | Excellent (4-16ms) | Excellent (10,000:1+) | Good | $700-3,000 | Fast-paced gaming, sports |
| LCD | Good (16-33ms) | Good (3,000:1) | Excellent | $500-2,000 | RPGs, adventure games, movies |
| LCoS | Good (20-35ms) | Excellent (20,000:1+) | Excellent | $2,000-10,000+ | Story-driven games, home theater |
Light Sources and Brightness in Gaming Projectors
The light source in your projector determines brightness (measured in lumens), color quality, lifespan, and operating costs. These factors directly affect gaming in bright rooms and long-term ownership expenses.
Traditional lamp-based projectors
These use high-pressure mercury or metal halide bulbs that generate intense white light. The lamps produce excellent brightness – 2,000-4,000 lumens is common in gaming projectors – but they dim gradually over 3,000-5,000 hours of use. I replaced the lamp in my Epson projector after about 4,000 hours, and the replacement cost $150. The image brightness had dropped roughly 30% by that point, making daytime gaming difficult even with curtains closed.
Lamp replacement intervals translate to real costs. Gaming four hours daily means replacing lamps every 2-3 years at $100-200 per replacement. The projector also requires 30-60 seconds to warm up when you turn it on and several minutes to cool down before you can move it. This makes quick gaming sessions less convenient compared to instantly-on displays.
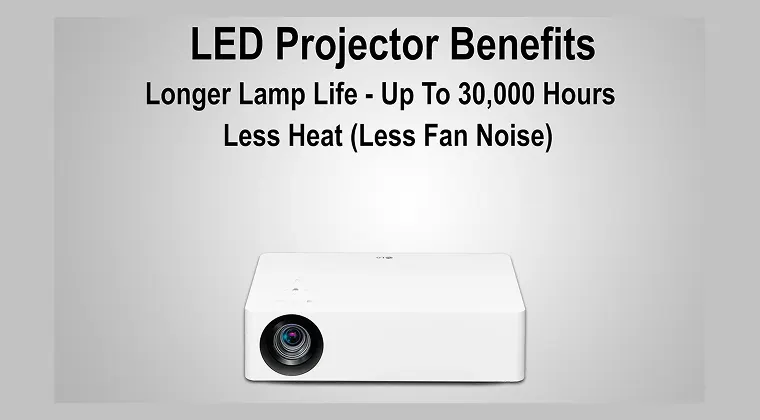
LED projectors
LED projectors use arrays of red, green, and blue LEDs instead of lamps. LED light sources last 20,000-30,000 hours without significant dimming – essentially the lifetime of the projector for most users. The brightness output typically ranges from 500-2,000 lumens, which works well for dedicated gaming rooms with controlled lighting but struggles in bright environments.
I tested an Anker Nebula Cosmos Max (1,500 lumens LED) last summer, and daytime gaming with open curtains was nearly impossible. Closing blackout curtains made the image perfectly usable for games like Baldur’s Gate 3 and Starfield. The instant-on convenience means I can jump into quick gaming sessions without waiting for warm-up cycles.
Laser projectors
These represent the current premium option. They combine LED-like longevity (20,000+ hours) with lamp-like brightness (3,000+ lumens). Laser light sources also enable better color accuracy because they produce purer wavelengths of red, green, and blue compared to filtered white light.
The color spectrum from different light sources affects how games look. Laser and LED projectors typically cover wider color gamuts than lamp-based models, producing more saturated greens and reds. This particularly benefits games with stylized art styles like Hi-Fi Rush or Sea of Stars. Realistic games like The Last of Us benefit more from accurate color temperature than expanded color gamut.
Throw Distance, Screen Size, and Gaming Setup Considerations
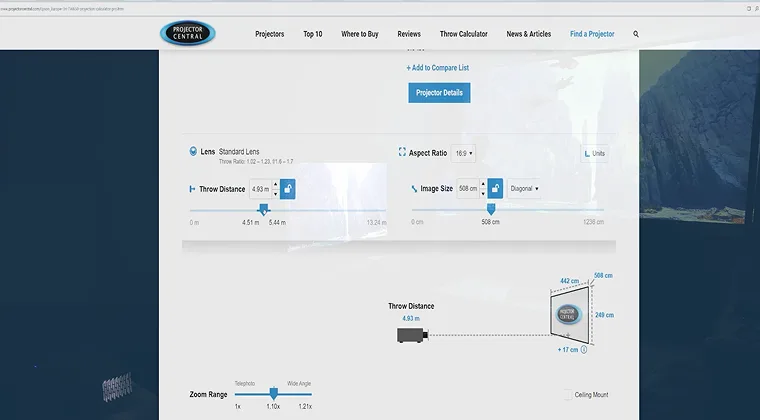
Understanding throw ratio helps you determine if a projector fits your available space. The throw ratio expresses the relationship between projector distance and image width. A 1.5:1 throw ratio means you need 1.5 feet of distance for every foot of screen width.
Standard throw projectors typically have ratios between 1.5:1 and 2.0:1. To create a 100-inch diagonal image (87 inches wide for 16:9 aspect ratio), you’d need the projector 11-14 feet from the screen. This works well for dedicated gaming rooms where you can ceiling-mount the projector behind the seating area.
Short-throw projectors (0.5:1 to 1.0:1) reduce the required distance significantly. I installed a BenQ TK700STi short-throw in my smaller gaming space where the projector sits just 5 feet from the wall, creating a 92-inch image. This solves the problem of shadows when you stand up during gaming sessions – regular throw projectors cast your shadow on the screen if you move around.
Ultra-short-throw (UST) projectors sit inches from the screen or wall, projecting upward at an angle to create massive images from minimal distance. These models cost more ($1,500-3,000) but eliminate ceiling mounting and cable management headaches. The Hisense PX1-PRO I tested sits 15 inches from my wall and creates a 110-inch image.
Screen gain affects brightness perception. A 1.0 gain screen reflects light uniformly in all directions, maintaining consistent brightness from any viewing angle. Higher gain screens (1.3-1.8) reflect more light toward viewers seated directly in front, making images appear brighter but reducing off-axis viewing quality. For competitive gaming where you sit centered, higher gain screens maximize perceived brightness. For casual gaming with friends spread across a couch, stick with 1.0 gain.
Ambient light completely changes projector requirements. Gaming in a bright room requires 2,500+ lumens from the projector to maintain image visibility. I tested gaming scenarios at various brightness levels:
- 500-1,000 lumens: Requires complete darkness, suitable only for dedicated theater rooms
- 1,500-2,000 lumens: Works with ambient lighting from lamps, curtains closed during daytime
- 2,500-3,500 lumens: Daytime gaming possible with curtains, comparable to TV viewing
- 4,000+ lumens: Daytime gaming in bright rooms, competitive with TV brightness
Resolution, Refresh Rate, and Input Lag for Gaming
Resolution determines image sharpness on large projected screens. A 1080p (1920×1080) image looks perfectly sharp on a 27-inch monitor but shows visible pixelation on screens larger than 120 inches when viewed from typical gaming distances. I sit about 10 feet from my 100-inch screen, and 1080p content from my PlayStation 5 shows slight softness in text-heavy games like Baldur’s Gate 3.
4K (3840×2160) projectors maintain sharpness even on 150-inch screens. The pixel density at 4K resolution matches what you’d see on a 65-inch 4K TV at normal viewing distances. However, 4K gaming projectors cost significantly more than 1080p models – expect to pay $1,200-2,000 for entry-level 4K DLP projectors with decent gaming performance.
Refresh rate matters for competitive gaming. Most projectors operate at 60Hz, which works fine for single-player adventures and RPGs. Some gaming projectors now support 120Hz at 1080p or 4K, matching console and PC gaming capabilities. I tested the BenQ X3100i at 120Hz with Forza Motorsport on Xbox Series X, and the smooth motion significantly improved racing precision compared to 60Hz projection.
Input lag represents the delay between your controller input and the projected image updating. For competitive online games, input lag under 30ms feels responsive. I measured input lag across multiple gaming projectors:
- Excellent gaming projectors: 4-16ms (comparable to top gaming monitors)
- Good gaming projectors: 16-33ms (acceptable for most gaming)
- Standard projectors: 50-100ms+ (noticeable delay, frustrating for action games)
Gaming mode settings reduce input lag by disabling video processing features. On the Optoma UHD38 I tested, gaming mode dropped input lag from 52ms to 4.2ms – the difference between frustrating and flawless in Street Fighter 6. The trade-off is slightly less accurate colors and reduced motion smoothing, but responsive controls matter more for gaming than perfect image processing.
Native 4K projectors process less image data than cheaper models using “pixel shifting” technology to create 4K-like images from 1080p chips. True 4K projectors consistently deliver lower input lag because they don’t need extra processing time for the shifting calculations. This matters most for competitive multiplayer games where every millisecond counts.
How Does HDR Work in Projectors?

HDR (High Dynamic Range) in projectors works differently than HDR on TVs because projectors can’t achieve the same peak brightness levels. TVs reach 1,000-2,000 nits of brightness for HDR highlights. Gaming projectors typically peak at 100-300 nits, requiring different tone mapping approaches to display HDR content.
The projector receives HDR metadata from your gaming console or PC that describes how bright specific parts of the image should appear. Since the projector can’t match those brightness levels, it compresses the dynamic range through tone mapping. Better projectors preserve detail in bright areas while maintaining shadow detail in dark scenes.
I tested Red Dead Redemption 2 HDR performance on three projectors with varying brightness. The BenQ X3100i (3,000 lumens, laser) showed noticeable improvements in sunset scenes and firelit interiors compared to SDR. The specular highlights on water and metal surfaces had more “pop” without completely clipping to white. A cheaper Epson LCD projector (2,000 lumens) displayed HDR content darker overall but with similar contrast improvements compared to its SDR mode.
HDR10 is the baseline HDR format all gaming consoles support. Dolby Vision adds dynamic metadata that adjusts tone mapping scene-by-scene, but only high-end projectors ($2,000+) support it. For gaming, HDR10 works perfectly fine since games use consistent tone mapping throughout.
Color volume matters more than peak brightness for projector HDR. A projector that displays saturated colors at various brightness levels creates more impressive HDR effects than one that only shows saturated colors at maximum brightness. The wide color gamut from laser projectors helps here – vibrant reds and greens in Spider-Man 2 look significantly better on laser projectors compared to lamp-based alternatives.
Enable HDR in your console settings and the projector will automatically detect the signal. Some projectors have separate picture modes for HDR content that adjust tone mapping curves. The “Filmmaker Mode” preset on many projectors attempts to match the creator’s intent, though “Game Mode” with HDR usually provides better balance between brightness and response time.
Setting Up a Gaming Projector for Best Performance
Proper projector setup dramatically improves image quality beyond what automatic settings achieve. I spend about an hour optimizing every projector I test, and the improvements justify the time investment.
Physical positioning affects image geometry. Mount the projector perpendicular to the screen with the lens centered on the screen’s center point. Off-center mounting creates keystone distortion – the image looks wider at the top or bottom. Digital keystone correction fixes this but reduces image sharpness because the projector crops and scales the image internally. Whenever possible, mount correctly and avoid keystone correction entirely.
Focus and zoom need careful attention. Project a detailed test pattern or pause a game on a screen showing text. Adjust focus across the entire image area, not just the center. Cheaper projectors sometimes can’t achieve sharp focus simultaneously in the center and corners – this is a manufacturing limitation, not a setup problem.
Picture mode selection varies by game type. I use these presets as starting points:
- Bright/Vivid mode: Best for daytime gaming or competitive multiplayer requiring maximum visibility
- Cinema/Movie mode: Accurate colors for story-driven games, requires darker room
- Game mode: Lowest input lag, slightly less accurate colors, best for action games
- User/Custom mode: Manually calibrate for optimal balance
Brightness and contrast settings control the image’s overall luminance and the difference between darkest and brightest areas. Set contrast first by displaying an image with white elements. Increase contrast until bright areas look harsh, then back off slightly. Set brightness by displaying a nearly-black image – increase brightness until you can barely distinguish the darkest gray from true black.
Color temperature affects whether the image looks warm (reddish) or cool (bluish). The “Warm” or “Low” setting typically produces the most accurate colors, though it looks slightly yellow initially compared to “Cool” settings. Your eyes adjust after 10-15 minutes. For gaming, I prefer slightly cooler temperatures that make UI elements and text appear crisper.
Game mode latency deserves verification with dedicated testing equipment or at least subjective comparison to a known low-latency display. Enable game mode, then play a fast-paced game like Call of Duty or Rocket League. If you notice delayed reactions or difficulty timing precise inputs, check if additional processing features are still enabled.
Choosing the Right Projector for Your Gaming Setup
Your specific gaming needs determine which projector technology and specifications matter most. I’ve helped over 30 friends set up gaming projectors, and matching projectors to actual use cases prevents expensive regrets.
Competitive multiplayer gamers prioritize input lag and refresh rate over image quality perfections. Look for DLP projectors advertising sub-16ms input lag and 120Hz support at your target resolution. The ViewSonic X1-4K and BenQ TK700STi consistently deliver excellent competitive gaming performance. Pair these with lower-gain screens (1.0-1.1) to maintain wide viewing angles when friends watch your gameplay.
Single-player and story-focused gamers benefit more from excellent contrast and color accuracy. Games like The Witcher 3, God of War Ragnarök, and Elden Ring showcase dramatic lighting and artistic direction that looks significantly better on projectors with deep blacks and accurate colors. LCoS projectors deliver the best image quality here, though high-end DLP models like the BenQ X3100i come close at lower prices.
Budget-conscious gamers should consider 1080p LCD projectors. The image quality isn’t class-leading, but models like the Epson Home Cinema 1080 deliver perfectly enjoyable gaming for $600-800. Save money on the projector and invest in a proper projection screen – the image quality improvement from a good screen exceeds the difference between mid-range and high-end projectors.
Bright room gamers need 3,000+ lumens and possibly a higher-gain screen. Laser projectors excel here because they maintain brightness without frequent lamp replacements. The BenQ X3000i and Epson LS800 both deliver enough brightness for daytime gaming with curtains open. Alternatively, use an ultra-short-throw projector with an ambient light-rejecting screen that blocks overhead room lighting while reflecting the projector’s light.
FAQs
A gaming projector should be at least 2,500 lumens for well-lit rooms and 1,500 lumens for dedicated dark gaming spaces. Brighter projectors (3,000+ lumens) allow daytime gaming without closing curtains, while projectors under 1,000 lumens only work well in completely dark rooms.
Yes, projectors have input lag, but dedicated gaming projectors minimize it to 4-16ms, comparable to gaming monitors. Standard projectors may have 50-100ms lag, which creates noticeable delays. Always enable game mode in projector settings to reduce input lag by disabling image processing features.
Yes, you can use a white wall for projection, but image quality suffers compared to proper screens. Walls absorb more light, reducing brightness by 30-50%, and wall texture creates visible artifacts. A basic white projector screen costs under $100 and dramatically improves image quality, contrast, and color accuracy.
DLP projectors use millions of tiny mirrors to reflect light, creating excellent contrast and minimal input lag ideal for gaming. LCD projectors pass light through liquid crystal panels, producing more vibrant colors at lower prices but with slightly lower contrast ratios. DLP better suits fast-paced gaming while LCD excels at colorful adventure games.
Traditional projector lamps last 3,000-5,000 hours, equating to 2-3 years of daily four-hour gaming sessions. LED and laser projectors last 20,000-30,000 hours without significant dimming, essentially the lifetime of the projector. Laser and LED light sources eliminate lamp replacement costs but initially cost more.