


How to Clean Thermal Paste off CPU
Eneba Hub contains affiliate links, which means we may earn a small commission if you make a purchase through them—at no extra cost to you. Learn more

Thermal paste is a heat-conductive compound that sits between your CPU and cooler, filling microscopic gaps to improve heat transfer. Over time, this paste degrades, dries out, and loses its effectiveness, leading to higher temperatures and potential thermal throttling. When your CPU runs hotter than it should, you’ll notice reduced performance, system instability, or even unexpected shutdowns during demanding tasks.
Knowing how to clean thermal paste off CPU surfaces is crucial before reapplying fresh compound. Old, degraded paste creates an insulating barrier rather than conducting heat effectively.
If you’re upgrading your cooler, troubleshooting overheating issues, or performing routine maintenance, proper thermal paste removal makes sure there’s optimal contact between the CPU and heatsink. The cleaning process requires specific materials and careful technique to avoid damaging delicate components, but it’s straightforward once you understand the steps involved.
Jump to:
How to Clean Thermal Paste off CPU
Cleaning thermal paste off a CPU involves carefully removing old compound using isopropyl alcohol and lint-free materials. The process starts with powering down your system completely, removing the CPU cooler, and gently scraping away bulk residue. You’ll then use high-concentration isopropyl alcohol (90% or higher) applied to microfiber cloths or cotton swabs to dissolve and wipe away remaining paste from both the CPU surface and cooler base.
Old thermal paste must be removed because it dries out over time, losing thermal conductivity and creating air pockets that trap heat. Degraded paste can become crusty, separate from surfaces, or turn into a thick, ineffective barrier. When you learn how to clean thermal paste off CPU components properly, you restore a smooth, clean surface that allows fresh paste to make direct contact with both the processor and heatsink.
The alcohol-based cleaning method is the safest and most effective approach for removing thermal paste. Isopropyl alcohol evaporates quickly without leaving residue, doesn’t conduct electricity, and effectively dissolves silicone and metal-based compounds. Proper cleaning achieves a mirror-smooth surface on both components, ensuring your new thermal paste can spread evenly and maximize heat transfer. This preparation step directly impacts your system’s cooling performance and CPU longevity.
What You’ll Need to Remove Thermal Paste
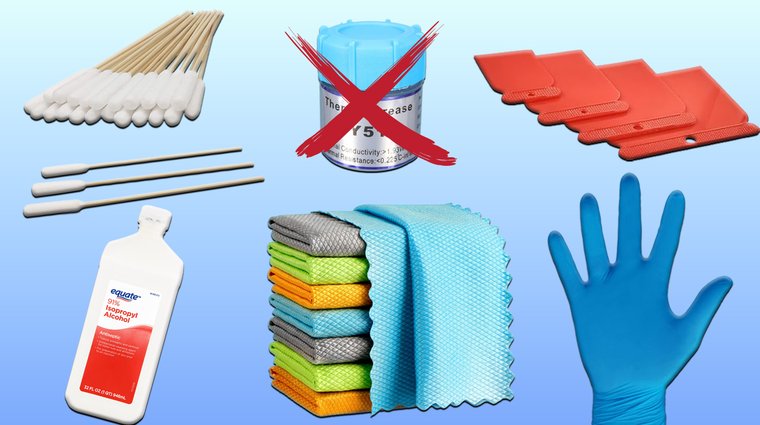
Before you start, gather these essential materials for safe and effective thermal paste removal:
- Isopropyl alcohol (90% or higher) – lower concentrations contain more water and take longer to evaporate.
- Microfiber cloths or coffee filters – lint-free options that won’t scratch delicate surfaces.
- Cotton swabs – ideal for reaching tight areas around the CPU die and cooler brackets.
- Plastic or metal scraper (an old credit card works well) – helps remove bulk paste without damaging components.
- Disposable gloves (optional but recommended) – prevent skin oils from contaminating surfaces and protect your hands from alcohol exposure.
How to Clean Thermal Paste on Your CPU Step By Step
Follow these steps carefully to remove old thermal paste and prepare your CPU for a fresh application.
Step 1: Power Down and Remove the Heatsink
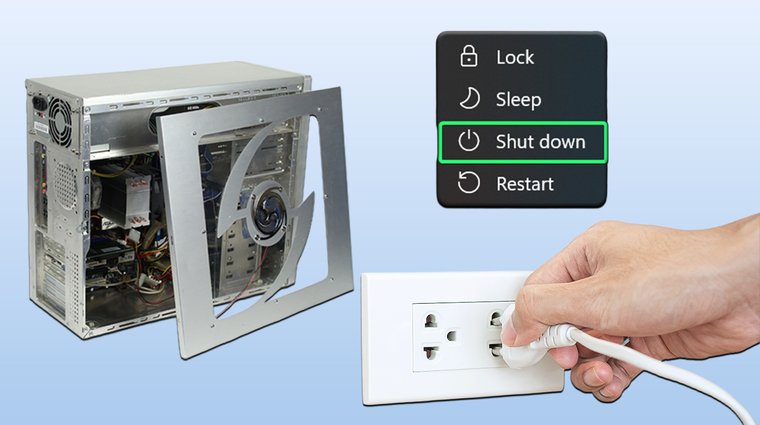
Completely shut down your PC and unplug the power cable from the wall – not just the power button, but physically disconnect it. This eliminates any risk of electrical shock or short circuits while working on components. Remove your case’s side panel to access the motherboard and CPU cooler.
Disconnect the cooler’s power cable from the motherboard header, then carefully unscrew or unlatch the mounting mechanism. Some coolers use spring-loaded screws that require a cross-pattern removal (loosen each screw partially before fully removing any). Gently twist the cooler slightly if it resists removal – old paste can create suction. Never yank or pull forcefully, as this could damage CPU pins (on AMD systems) or bend the socket (on Intel systems).
Step 2: Remove the Old Thermal Paste
Start by using a plastic scraper or old credit card to gently remove the bulk of dried thermal paste from both the CPU surface and cooler base. Hold the scraper at a shallow angle and use light pressure – you’re not trying to scratch anything, just lifting off the thick layer. This prevents smearing paste around when you start using alcohol.
Apply isopropyl alcohol directly to a cotton swab or microfiber cloth (never pour it directly onto the CPU). Wipe the surface in one direction, turning to a clean section of cloth with each pass. The alcohol dissolves the remaining paste residue, making it easy to wipe away. For stubborn spots, let an alcohol-soaked cloth sit on the area for 10–15 seconds before wiping.
Important: If you previously used liquid metal thermal compound, do not mix it with regular alcohol cleaning. Liquid metal requires specific removal procedures and different cleaning agents.
Step 3: Inspect and Clean Further
After your initial cleaning pass, examine both surfaces under good lighting – look at them from different angles to spot any remaining residue. The CPU die and heatsink base should appear completely clean with no discoloration, streaks, or patches of old paste. Even microscopic residue can reduce thermal transfer efficiency.
If you notice stubborn residue, repeat the alcohol cleaning process with a fresh cloth or swab. Some thermal pastes, particularly older or lower-quality compounds, leave behind a thin film that requires multiple cleaning passes. The goal is a perfectly smooth, dry surface that looks like it came from the factory. Once satisfied, let both components air-dry for 2–3 minutes, though high-concentration isopropyl alcohol evaporates almost instantly.
Step 4: Apply New Thermal Paste
Place a pea-sized amount of thermal paste directly in the center of the CPU die – roughly 3–4mm in diameter. This is the most reliable application method because mounting pressure from the cooler naturally spreads the paste across the entire surface. The “pea method” prevents air bubbles and ensures even coverage without using too much compound.
Alternative methods include a grain-of-rice-sized dot or a small vertical line, but these work better for smaller dies. Never manually spread thermal paste with a card or spatula – this introduces air bubbles and uneven thickness. The correct amount matters because too little paste leaves gaps in coverage, while excess paste can spill over the CPU edges and reduce cooling efficiency. When done correctly, you’ll see a thin, even layer after mounting the cooler.
XTM70 Extreme Performance Thermal Paste

The Corsair XTM70 represents a high-performance thermal solution designed for enthusiasts who demand maximum heat transfer. This ultra-premium paste achieves exceptional thermal conductivity, making it ideal for overclocked systems and high-TDP processors that generate significant heat loads. The compound maintains consistency across extreme temperature ranges without pumping out or degrading.
I’ve tested the XTM70 on several high-end builds where the best CPU for gaming components were pushing thermal limits under sustained loads. The paste’s low thermal resistance noticeably improved temperature headroom compared to stock compounds, typically dropping loads temps by 3–5°C in real-world gaming scenarios. Its extended longevity means you won’t need to reapply as frequently as budget alternatives.
For builders assembling a powerful gaming PC who plan to push their hardware, the XTM70 provides the thermal performance margin needed for sustained overclocks. The included applicator makes precise pea-sized application straightforward, and the 3-gram syringe contains enough compound for multiple applications.
ARCTIC MX-6 (4 g) Thermal Paste
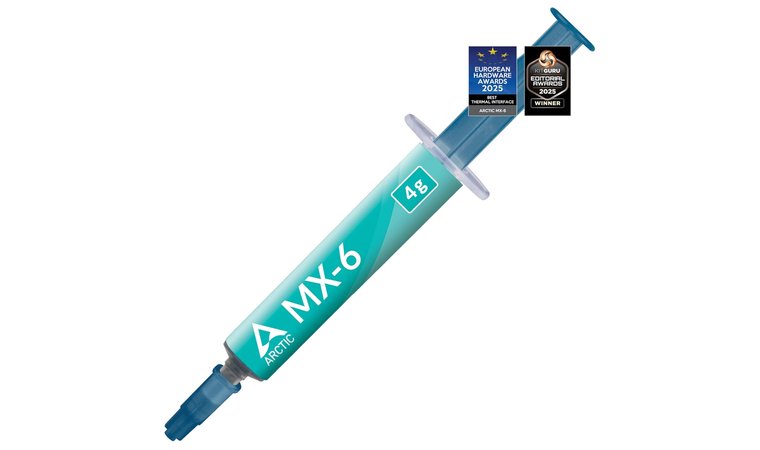
ARCTIC MX-6 provides ultimate performance through its advanced carbon microparticle formula while maintaining a non-conductive, non-metallic composition. This means even if you accidentally apply too much and it spills onto surrounding components, there’s no risk of short circuits. The paste’s consistency makes application easy for first-time builders while providing thermal performance that rivals premium compounds.
The MX-6 particularly excels in systems using the best cpu cooler setups where sustained contact pressure helps the compound achieve optimal spread. Its extended lifespan (rated for up to 8 years) makes it perfect for users who want to install once and forget about maintenance for years. The thermal conductivity improvements over previous MX generations are noticeable in temperature monitoring software.
When I upgraded a friend’s gaming rig that was thermal throttling, switching from dried-out stock paste to MX-6 dropped idle temperatures by 8°C and load temps by 12°C. For builders concerned about what a good CPU temp is and want reliable, long-lasting thermal management, this paste offers excellent value. The 4-gram tube provides enough for approximately 15 applications.
ARCTIC MX-4 (4 g) Thermal Paste
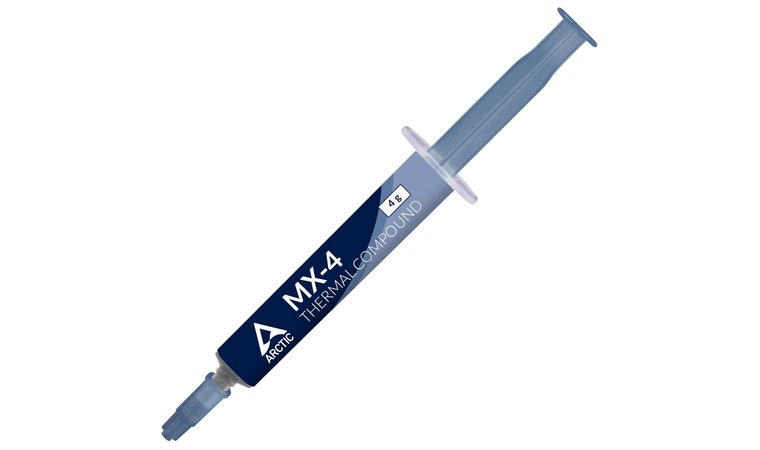
ARCTIC MX-4 has earned its reputation as a premium-performance paste with exceptional price-to-performance ratio. This compound has been a favorite among PC builders for years because it consistently delivers temperatures within 1–2°C of more expensive alternatives while costing significantly less. The metal-free, non-conductive formula is particularly reassuring for beginners worried about application mistakes.
The paste’s consistency strikes the perfect balance – thick enough to stay where you apply it but fluid enough to spread evenly under cooler mounting pressure. I’ve used MX-4 across dozens of builds ranging from budget gaming systems to workstation rigs, and it’s never disappointed. The compound doesn’t require a curing period, meaning you’ll see optimal thermal performance immediately after installation.
For users wondering how much thermal paste they should apply on their own CPUs, MX-4‘s forgiving nature means slight variations in amount (within reason) won’t dramatically impact performance. Its 8-year durability rating guarantees you won’t need to reapply anytime soon, even if you’re monitoring the CPU temp regularly, trying to make sure it doesn’t get too hot. The 4-gram syringe provides enough paste for multiple CPU installations and reapplications.
Step 5: Reattach the Heatsink
Carefully align the heatsink over the CPU, ensuring the mounting brackets or screws line up with the motherboard holes. Lower the cooler straight down onto the CPU without tilting or sliding it – any lateral movement after contact can trap air bubbles in the thermal paste. Once positioned, hold the cooler steady while securing the mounting mechanism.
Tighten mounting screws in a cross or star pattern (opposite corners alternately) rather than going around in a circle. This ensures even pressure distribution across the CPU die, which is critical for proper thermal paste spread and optimal heat transfer. Don’t overtighten – stop when you feel firm resistance, as excessive force can crack the CPU die or damage the socket. Reconnect the cooler’s power cable to the appropriate motherboard header.
Step 6: Reassemble and Test
Replace your PC’s side panel and reconnect all cables you unplugged during disassembly. Double-check everything – the cooler power cable, case fans, and any components you may have moved to access the CPU area. Plug in your power cable and boot the system.
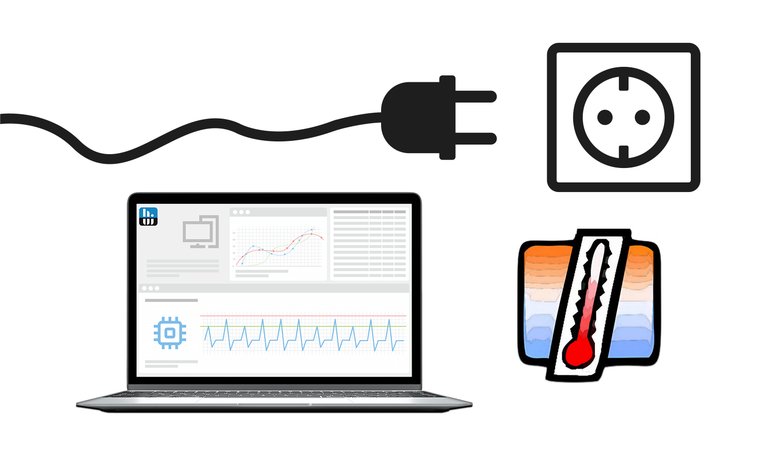
Enter your BIOS/UEFI to check CPU temperatures immediately – idle temps should be noticeably lower than before cleaning. Install monitoring software like HWiNFO, Core Temp, or your motherboard manufacturer’s utility to track temperatures under load. Proper thermal paste application shows immediate results: idle temps typically sit 10–20°C above ambient room temperature, while load temperatures stay well below thermal throttling thresholds (usually 85–95°C depending on the CPU model).
Run a stress test for 10–15 minutes to ensure cooling performance under sustained load. If temperatures look good and remain stable, you’ve successfully completed the thermal paste cleaning and reapplication process.
Keep Your CPU Running Cool
Knowing how to clean thermal paste off CPU surfaces is an essential maintenance skill that directly impacts your system’s longevity and performance. The process requires minimal tools – just isopropyl alcohol, lint-free materials, and careful technique – but the thermal benefits are substantial. Regular cleaning and reapplication every 2–3 years prevent thermal throttling, extend component lifespan, and maintain optimal gaming performance.
Remember the key steps: power down completely, remove the cooler carefully, use alcohol to dissolve old paste, inspect surfaces thoroughly, apply a pea-sized amount of fresh compound, and reattach the cooler with even pressure. These fundamentals ensure proper heat transfer between your processor and cooling system.
For the best thermal management results, pair your newly cleaned CPU with quality components. Choosing the best CPU for your build guarantees that your cooling efforts provide maximum performance benefits. No matter if you’re building a new system or maintaining your current rig, proper thermal paste application keeps your hardware running at peak efficiency for years.
FAQs
Replace thermal paste every 2–3 years under normal usage conditions to maintain optimal thermal performance. Heavy users running demanding applications, overclocking, or operating in hot environments may need annual reapplication.
Use isopropyl alcohol at 90% concentration or higher along with lint-free microfiber cloths or coffee filters. Cotton swabs help reach tight spaces, while a plastic scraper removes bulk paste before alcohol cleaning.
No, paper towels leave lint fibers on the CPU surface that interfere with thermal paste application and reduce heat transfer. Use microfiber cloths or coffee filters instead for clean, residue-free surfaces.
Alcohol is necessary for proper thermal paste removal because it dissolves compound residue that mechanical wiping cannot remove. Never use water-based cleaners, solvents, or household cleaners that leave residue.
Never use water to clean thermal paste from CPU surfaces. Water conducts electricity, leaves mineral deposits, and creates corrosion risk while taking far longer to evaporate than isopropyl alcohol.
Rubbing alcohol and 70% isopropyl alcohol are similar but not ideal for electronics. The 30% water content evaporates slowly and leaves residue. Use 90% or 99% isopropyl alcohol instead.