


How to Learn Game Physics: A Beginner’s Roadmap for 2026

Eneba Hub contains affiliate links, which means we may earn a small commission if you make a purchase through them—at no extra cost to you. Learn more


Recent update
Try Coursera for a structured Unity physics course, then apply each concept in a small playable scene.
How to learn game physics comes down to connecting mechanics with small experiments in an engine like Unity. This roadmap connects the tools, courses, and practice projects you need to turn physics concepts into working gameplay. This guide shows readers with some coding exposure how to learn game physics for more control over movement and collisions.
You can begin with a game physics course that is free to enroll in on Coursera. Its published schedule is ten hours over one week, but course completion isn’t a mastery deadline. The useful milestone is explaining why an object moved, then changing its behavior deliberately.

Start with engine-based experiments before attempting game physics engine development. A small scene gives you visible feedback without the complexity of building an entire simulation system.
Jump to:
Game Physics at a Glance
Learning game physics is easier to plan when you separate course time from practice time. These facts outline the starting point without treating a lesson schedule as a promise of proficiency.
|
Cost to start |
Coursera course is free to enroll; software and access conditions depend on your choices |
|---|---|
|
Time to learn the basics |
Course schedules provide a starting point; independent practice takes additional time |
|
What you need |
A computer that supports your chosen engine, basic coding, and algebra |
|
Main hurdles |
Translating vectors, forces, and collision behavior into code |
|
Beginner suitability |
Medium: some coding familiarity makes the experiments easier to follow |
You don’t need game physics engine development experience to begin. First, learn what the engine simulates and what your scripts control.
What Game Physics Is Actually Used For
Game physics is the set of systems that make objects move, collide, and react inside a game. The practical goal is predictable, controllable interaction, which can serve playful mechanics as well as physically convincing simulations.
The following uses give game physics programming a concrete purpose:
- Object interactions: Make a ball roll down a slope, push a crate, or knock over a tower. A rigid body is an object simulated as a solid shape that doesn’t deform.
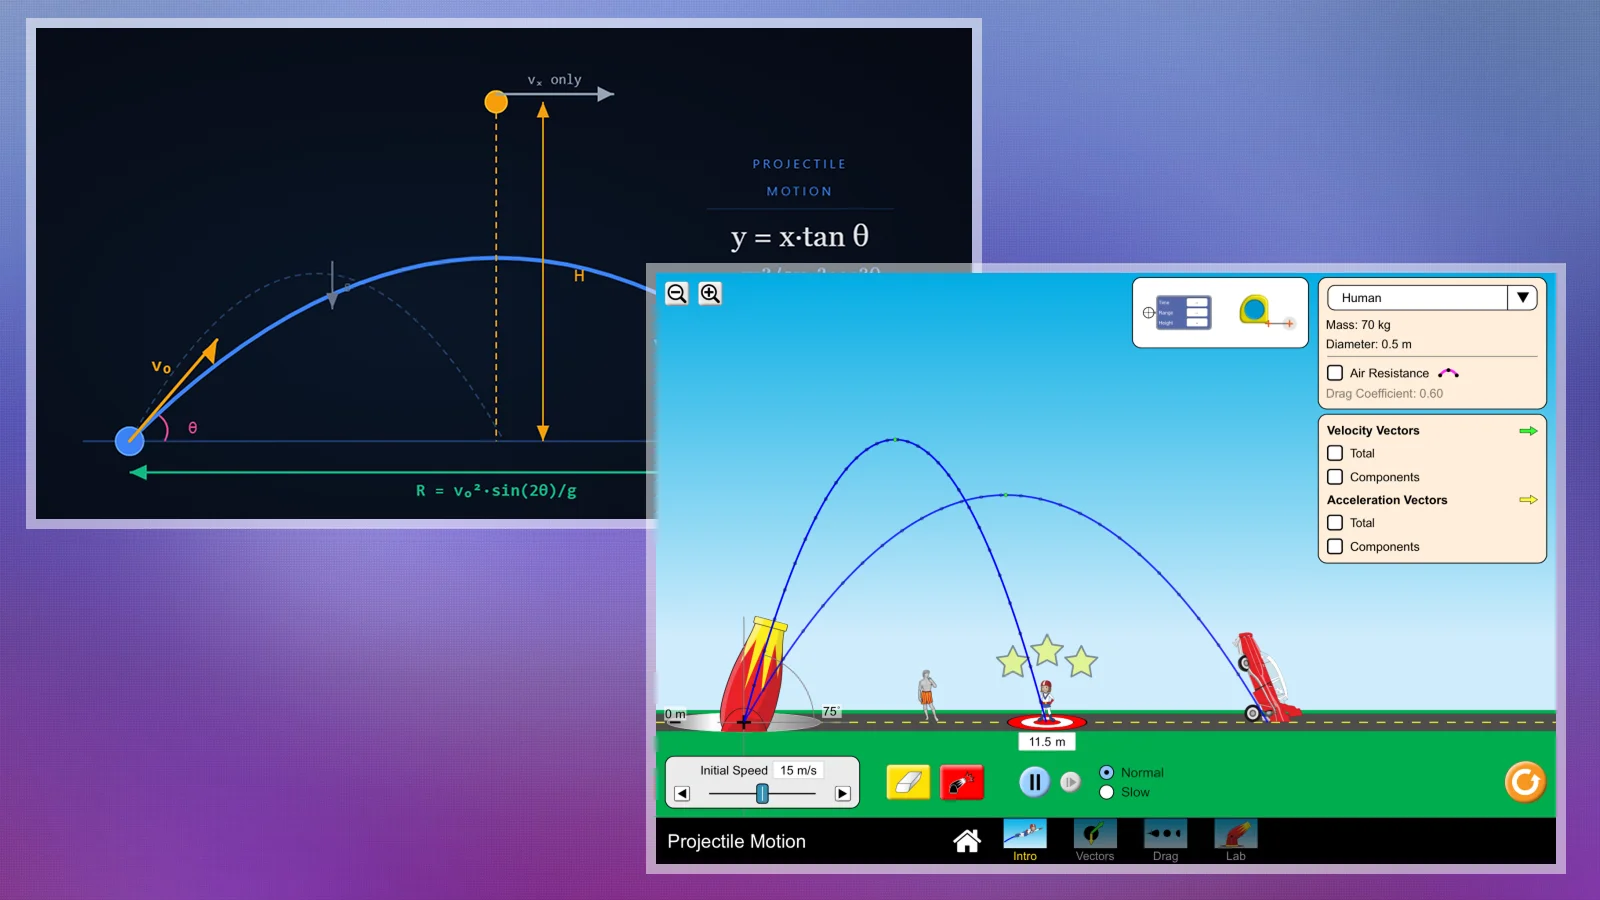
- Projectile motion: Build a launcher whose shots arc toward a target. Gravity changes velocity over time; velocity describes an object’s speed and direction.
- Friction and contact: Give surfaces different resistance to sliding. Compare a crate on a rough platform with the same crate on a slippery platform.
- Rotational mechanics: Apply torque, the turning effect of a force, to spin an object. Inertia describes resistance to changes in motion, including rotation.
- Custom simulation systems: Explore game physics engine development when you want to implement motion updates or collision responses yourself instead of relying entirely on built-in behavior.
Learning game physics also helps you identify deliberate shortcuts. A platformer jump can prioritize responsive controls over physical accuracy, while a stacking puzzle needs stable contact between objects.
A game physics book can explain the mathematics behind those choices. Use its diagrams alongside experiments rather than treating every equation as a feature your game needs.
What You Need To Start Learning Game Physics
Start with an engine you can run and scripts you can understand. Familiarity with basic algebra is more useful at this stage than buying advanced software or assembling a large reading list.
Prepare the following before your first experiment:
- Hardware: Use a computer that meets your chosen engine’s requirements. Keep the practice scene simple so visual complexity doesn’t obscure simulation problems.
- Software: Pick one engine and stay with it through your first finished demo. Unity matches the named courses in this guide.
- Coding: Practice variables, functions, and conditional statements. Game physics programming becomes harder to debug when the surrounding script is unfamiliar.
- Math: Review vectors, coordinates, and units. A vector represents a quantity with a direction, like velocity or force.
- Reference material: Choose a game physics book that explains its notation and includes worked examples you can reproduce.
The tools below serve different learning approaches:
|
Tool |
Best for |
Price |
|---|---|---|
 |
Following the named Unity physics courses |
Free plan; paid plans available |
 |
Practicing mechanics in an alternative engine |
Free |
 |
Learners who prefer a different scripting workflow |
Free for noncommercial use; paid commercial license |
 |
Exploring interactions through a visual workflow |
Paid; limited free edition |
When deciding how to learn game physics, choose an engine that matches your lessons rather than one with the longest feature list. Readers learning game physics through the courses below should stay with Unity initially; switching engines adds another source of confusion.
How to Learn Game Physics: A Step-by-Step Path
Learn game physics through small experiments with visible outcomes, then combine them into a playable demo. Coursera lists its course schedule as 1 week at 10 hours a week. Treat that as course pacing, with additional time for debugging and independent practice.
Follow this sequence rather than jumping straight into game physics engine development.
Step 1: Set Up a Small Test Scene
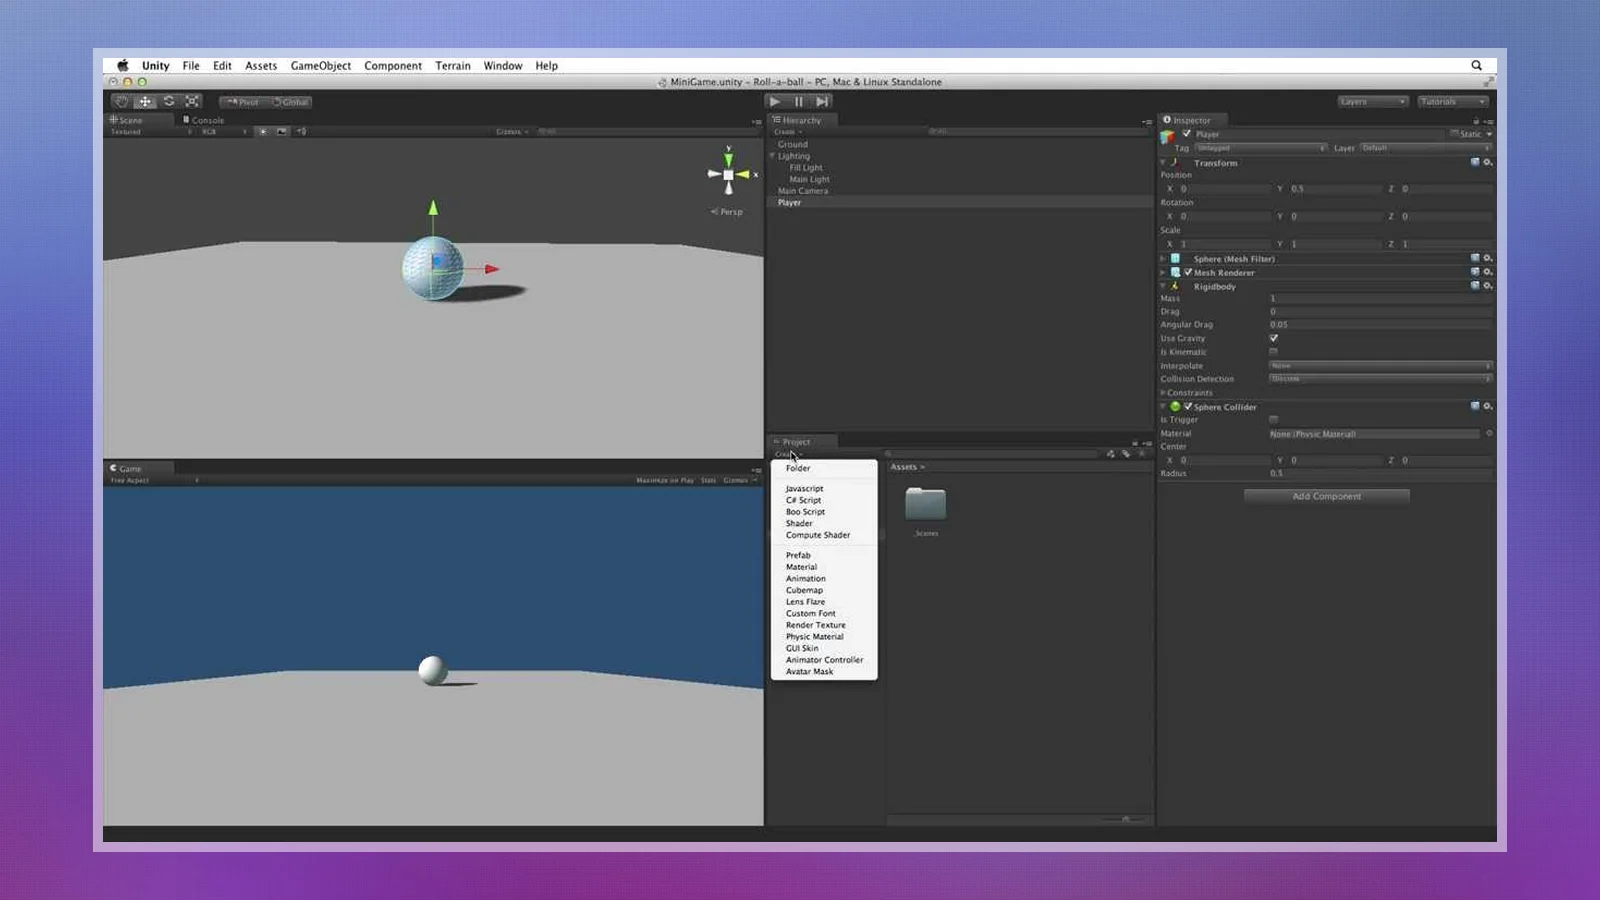
Install Unity and create a scene with a floor and a movable object. Add a rigid body and a collision shape, which defines the boundary used for contact detection. Run the scene before adding custom behavior so you can observe its starting state.
Review coordinates and basic C# if the setup feels unfamiliar. Keep a short notebook for game physics programming beside the project, and record each change with its result. Learning game physics is easier when you can distinguish an engine setting from a change in your own code.
Step 2: Connect Forces to Motion
Apply a force to the object and observe its acceleration, the change in velocity over time. Repeat the experiment with a different mass while keeping the other settings unchanged. Explain the result in plain language before adding another mechanic.
Use your game physics course to connect Newton’s laws with what you see onscreen. Avoid moving the object directly while also asking the simulation to control its motion. Game physics programming becomes clearer when each movement has an identifiable cause, and you can trace that cause through the script.
Step 3: Build a Projectile Experiment
Create a launcher that sends an object toward a target. Draw or describe the path you predict, then compare it with the simulated result. Change the launch direction separately from its strength so the effect of each input remains visible.
Your game physics programming notes should record units for distance, time, and velocity. A game physics book is useful here if the relationship between an equation and the trajectory still feels abstract. Add air resistance only after the simpler version behaves consistently. The goal is understanding a model before increasing its complexity.
Step 4: Add Friction and Rotation
Introduce a surface where the projectile can land, slide, or roll. Observe contact behavior before applying torque to a separate object. Keep rotation isolated until you understand the difference between a force that changes linear motion and one that changes angular motion.
Consult your game physics course when an unfamiliar setting changes the result. Advanced rotational mathematics can wait until you need it. A good introduction to game physics engine development should make you more curious about the solver, the system that calculates interactions, without requiring you to replace it immediately.
Step 5: Finish and Share a Playable Demo
Turn the launcher experiment into a compact game with a target, a reset action, and clear feedback after a shot. Remove features that distract from the physics concept. Test the same interaction repeatedly, then ask another person to play without instructions.
Explain which parts use the engine’s simulation and which parts your scripts control. That explanation is a useful test of learning game physics. Use feedback to fix confusing behavior before expanding the project. A finished demo gives your next lesson a concrete starting point.
Best Courses for Learning Game Physics
When researching how to learn game physics, prioritize courses you can apply in your current engine. Master Unity Game Physics: Apply, Simulate & Transform on Coursera is the structured starting point here; the Udemy option offers a focused alternative around gravitation and rotation.
A course should answer how to learn game physics through exercises you can modify, not videos you only watch.

Udemy lists 5 hours of on-demand video for the featured course. Its related listing also names Physics For Unity 6.2 & C# – Lifetime Access at 3.5 hours; choose that version-specific option only if it matches your learning setup.
Compare the named options below:
|
Course |
Provider |
What it covers |
|---|---|---|
|
Master Unity Game Physics: Apply, Simulate & Transform |
[FILENAME: coursera-logo] |
Four-module course, about one week at ten hours a week. Covers Newton’s laws, forces, projectile motion, gravity, torque, vectors, and rotational physics using Unity. Includes practical simulations, assessments, and a shareable certificate. |
|
Game Physics – Introducing Gravitation & Rotation in Unity |
[FILENAME: udemy-logo] |
Approximately five hours of on-demand video. Covers gravitational forces, rotational motion, and coding rigidbody physics from scratch using Unity and C#. Focuses on understanding and implementing physics calculations in game development. |
|
Physics For Unity 6.2 & C# – Lifetime Access |
[FILENAME: udemy-logo] |
Beginner to intermediate level, approximately 3.5 hours of video. Covers 2D and 3D physics, rigidbodies, colliders, joints, forces, and collision detection in Unity. Includes C# coding exercises and physics-based game projects. |
|
Unity Physics Fundamentals |
[FILENAME: pluralsight-logo] |
Beginner-level, two hours and 37 minutes. Covers rigidbody parameters, colliders, collision and trigger events, physics materials, joints, and ragdoll physics. Includes practical lessons on building a vehicle using wheel colliders. Available through a Pluralsight subscription or free trial. |
|
Unity 2D Physics Fundamentals |
[FILENAME: pluralsight-logo] |
Beginner-level, one hour and 33 minutes. Covers 2D collision detection, rigidbodies, gravity, physics materials, joints, effectors, and scripting in Unity. Includes practical exercises for building physics-based interactions. Available through a Pluralsight subscription or free trial. |
Pair a game physics course with a game physics book if written explanations help you follow the mathematics. Choose a book that demonstrates how to learn game physics through worked examples rather than treating its page count as a measure of usefulness.
Practice Projects That Build Game Physics Skills
Short projects make game physics programming easier to explain and debug. Build these in increasing difficulty, and keep each focused on a behavior you can test.
Use the following projects to learn game physics beyond a copied tutorial:
- Rolling-ball slope: Place a ball on an incline and compare its motion after changing the slope or surface. This teaches observation and controlled experimentation. Write down the predicted result before running the scene.
- Hit-the-target launcher: Add aiming controls and a visible target to your projectile experiment. This teaches the relationship between launch direction, velocity, and gravity. Separate aiming problems from collision problems as you debug.
- Stacking-blocks tower: Build a tower in Unity or Godot and test its response to an impact. This teaches contact behavior and stability. Start with simple shapes before introducing irregular objects.
- Gravity-and-paddle game: Use Python and Pygame to implement motion and bounce yourself. This introduces game physics engine development at a manageable scale because you must define the update rules explicitly. Keep the collision shapes simple.
- Spinning-object experiment: Apply torque and compare rotational behavior after changing the object’s mass distribution. This teaches angular motion and prepares you for more advanced models. Use a game physics book to understand the mathematics before simulating how a spinning ball curves through the air.
Learning game physics through these projects should produce explanations as well as playable scenes. If you can’t describe a result, reduce the experiment until you can.
How to Learn Game Physics: Debug Equations, Units, and Vector Direction
A common obstacle is memorizing equations without testing their meaning. Game physics programming becomes easier to troubleshoot when you compare a prediction with an observable result.
Use these fixes when progress stalls:
- Copying formulas without understanding them: Describe each variable before writing the calculation. Predict what should happen when it increases or decreases, then test that prediction in isolation. A game physics book should help explain the relationship, not become another source of code to copy.
- Mixing units: Label distance, time, mass, and velocity in your notes. Check that quantities in an equation use compatible units before changing engine settings. Random adjustments can hide the original error and make later debugging harder.
- Overcomplicating the model: State your assumptions before building. Start without extra effects, then add friction or resistance deliberately. Game physics engine development becomes much harder to reason about when several interacting systems change simultaneously.
- Losing vector direction: Sketch the coordinate axes and force directions before coding. Check local coordinates against world coordinates, especially for rotated objects. A correct magnitude with the wrong direction still produces incorrect behavior.
- Watching without building: Pause your game physics course and reproduce the mechanic in a fresh scene. Change a parameter, explain the outcome, and keep the result. Learning game physics requires decisions that a finished tutorial has already made for you.
Keep a small collection of working scenes you can return to when something breaks. A game physics book can supply a second explanation, while your known-good scene gives you a practical comparison. Reduce the problem, identify the cause, and rebuild gradually.
Final Verdict on Learning Game Physics
This path suits readers with some coding familiarity who want control over believable gameplay interactions. Start with the Coursera course and small Unity experiments, then choose the Udemy option if gravitation and rotation fit your project.
The game physics programming roadmap doesn’t suit readers who want to avoid code entirely. If basic scripting is the obstacle, practice variables, functions, and conditional statements before starting the Unity experiments. Readers who only need simple movement can postpone advanced rotation and game physics engine development until their game requires them.
The clearest answer to how to learn game physics is a course paired with a demo you can explain and modify independently. Your first useful milestone is understanding a specific interaction well enough to fix it. Finish that interaction before adding more theory, another engine, or a larger project.
FAQs
Start with basic coding and algebra, then follow a short course in Unity. Build a simple scene, predict how an object should move, and test it. Add complexity only after you can explain the result.
A short course can introduce the concepts, but independent practice takes longer. Use your ability to modify and debug a small simulation as the milestone, rather than treating video completion as proficiency.
Yes, the named Coursera course is free to enroll in. Check what your enrollment option includes before starting.
No, prior coding isn’t essential to begin exploring concepts. Learn basic scripting alongside them, though, because the Unity roadmap here involves writing and debugging code.
Yes, if you want to build or troubleshoot interactive movement and collisions. Focus on the mechanics your game needs. Advanced rotation is optional for projects that only require simple movement.
Use a compatible computer, an engine like Unity or Godot, and a way to write scripts. GameMaker Studio 2 and Construct 3 offer alternative workflows. Keep notes on units, predictions, and test results.
The course Master Unity Game Physics: Apply, Simulate & Transform on Coursera is the starting pick for this roadmap. The course shows how to learn game physics through hands-on experiments you can apply to your own projects.