

How to Unlock Loader Risk of Rain 2: Master the Melee Powerhouse

Unlocking Loader in Risk of Rain 2 is a rite of passage for players who love high-damage, melee-focused characters. Figuring out how to unlock Loader in Risk of Rain 2 isn’t straightforward – it involves triggering a hidden boss encounter, surviving a challenging battle, and understanding how to progress through the game’s fourth stage. Once you master the process, you’ll gain access to one of the most powerful survivors in the game, known for her grappling mobility and devastating melee attacks.
In this guide, I’ll break down every step, from locating the secret boss to emerging victorious in the fight, and then dive into how to optimize her playstyle. You’ll also find the best item recommendations, builds, and strategies to help you make the most of Loader’s raw strength and agility – turning her into a boss-crushing powerhouse.
Jump to:
How to Unlock Loader Risk of Rain 2
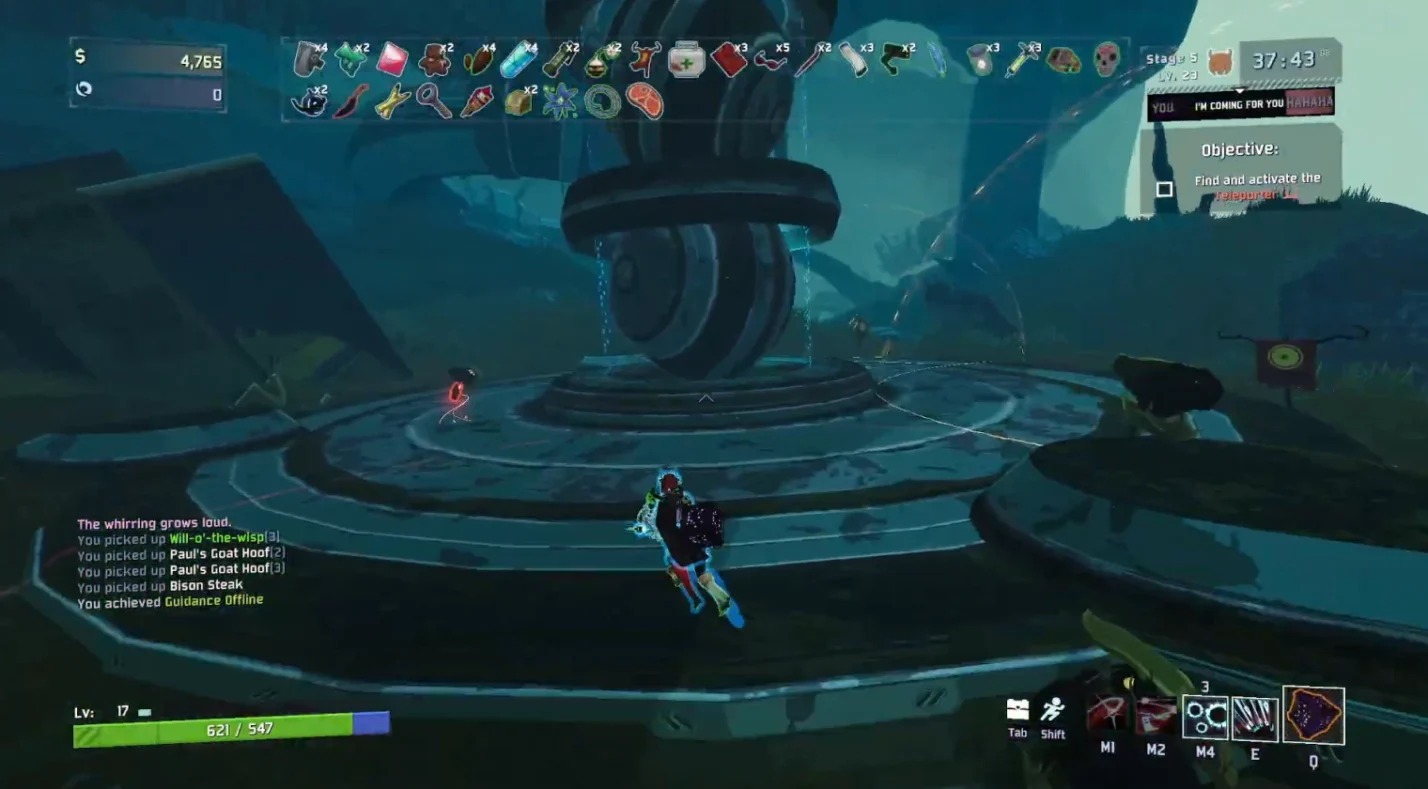
Completing the Guidance Offline challenge is the only way to unlock Loader. Guidance Offline is a hidden objective that asks you to defeat the unique guardian of Siren’s Call. Siren’s Call appears as one of the two possible fourth stages in a run, so you need to survive the early game and make it there. Once you’re in Siren’s Call, follow these steps:
- Locate the vulture nests. Spread across the map are clusters of blue egg‑like structures stuck to walls and cliff faces. They’re sometimes tucked behind rocks or up on ledges. Look for glowing blue clusters and listen for a whirring sound that signals you’re getting close.
- Destroy five nests. Shoot or punch each nest until it breaks. After destroying the fourth nest, a message appears in the chat telling you that you hear a distant whirring. Breaking the fifth nest causes the message “The whirring grows loud,” signalling that the boss is arriving. Items that automatically target enemies, such as fireworks, can destroy nests without your direct attention – useful if you’re busy fighting mobs.
- Fight the Alloy Worship Unit. The unique guardian is a hovering machine that spawns near the large cylindrical pillar in the middle of the map. It hovers above the arena and bombards players with explosives and laser beams. When its health drops below 50 percent, it triggers an alloy‑supercharged detonation, creates a shield, and spawns large blue circles that explode after five seconds. These attacks deal heavy damage and launch survivors into the air, so you need to keep moving and avoid standing in the circles.
- Defeat the guardian to unlock Loader. Once the Alloy Worship Unit falls, the Guidance Offline challenge completes, and Loader becomes available on the character select screen for all players in the lobby. Defeating the boss also drops a guaranteed Legendary item, which can be a nice bonus for the rest of your run.
Getting to Siren’s Call can be inconsistent because the fourth stage alternates between Siren’s Call and Rallypoint Delta (or other DLC stages). If you want to guarantee Siren’s Call, save up Lunar Coins, visit the Bazaar Between Time after the third stage, and purchase the “Dream” drop that lets you skip directly to Siren’s Call. Another trick is to loop by interacting with the prongs on the Primordial Teleporter in Sky Meadow; on subsequent loops, Siren’s Call appears again.
I learned the hard way that you can accidentally spawn the boss earlier than planned. During one run, my fireworks item destroyed several nests while I was searching for the teleporter. Suddenly, the Alloy Worship Unit spawned, and I was still low on items. Since then, I always clear the map systematically, destroy nests when I’m ready, and make sure I have enough damage items and healing before triggering the fight.
Understanding Loader’s Abilities
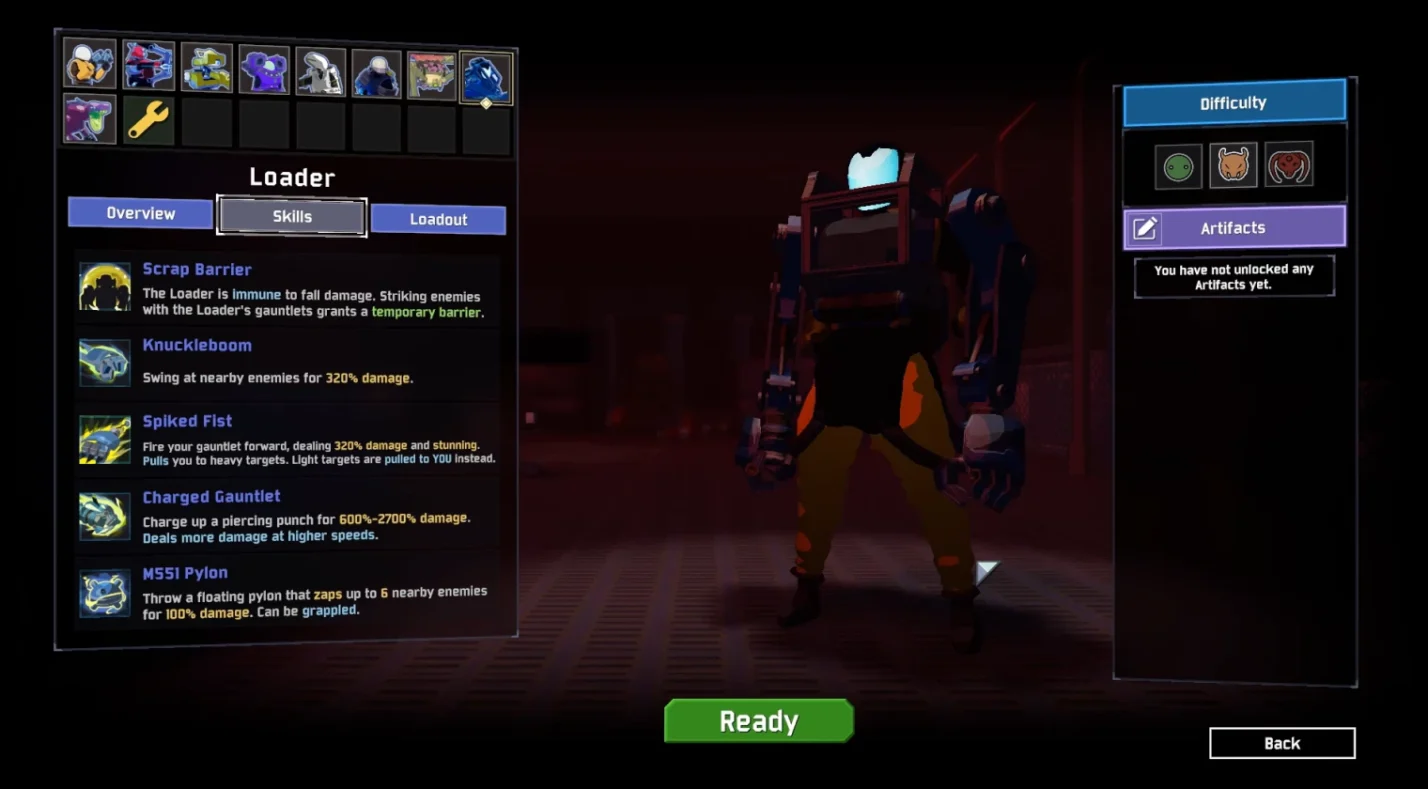
Loader is a heavy melee survivor who excels at burst damage and mobility through her grappling hooks. She’s immune to fall damage, gains a temporary barrier when hitting enemies, and uses a mix of punches and grapples to sling herself across the map. Her kit revolves around building momentum and converting that speed into massive damage. To appreciate her potential, let’s break down her abilities:
Scrap Barrier (Passive)
Loader takes no fall damage and gains a shield whenever she strikes an enemy with her gauntlets. The barrier amounts to five percent of her maximum health plus any current shield, and it stacks as you continue landing hits. This passive encourages aggressive play and keeps Loader alive in the thick of combat – the more you attack, the more shield you generate. Because she’s immune to fall damage, you can use vertical movement to your advantage without worrying about the landing.
Knuckleboom (Primary)
This basic attack lets Loader swing her fists at nearby enemies for 320 percent damage. It has a decent area, making it effective against groups of small targets. Use Knuckleboom between grapples or when your other skills are on cooldown. Combining Knuckleboom with Scrap Barrier quickly builds your shield and provides crowd control when enemies swarm.
Grapple Fist (Secondary)
Firing your gauntlet forward pulls Loader toward the target, letting her swing around the environment. Grapple Fist doesn’t deal damage, but it’s key to Loader’s mobility. Use it to cancel long animations, reposition quickly, or build speed before a Charged Gauntlet punch. Because the cooldown only triggers when the grapple attaches to something, you can cancel early by jumping or using another skill to reset the cooldown faster.
Spiked Fist (Secondary – Alternate)
Unlocked by completing the Swing By challenge (reach and go through the Celestial Portal in 25 minutes or less as Loader), Spiked Fist deals 320 percent damage when the gauntlet connects and pulls Loader to heavy targets while dragging light targets toward you. This offensive upgrade gives your grapple a damaging impact and interrupts enemies. It’s particularly useful for pulling large monsters toward you or closing the gap on a fleeing elite.
Charged Gauntlet (Utility)
Loader’s signature punch charges up a piercing attack, dealing 600 to 2700 percent damage, plus extra damage based on her movement speed. The faster you’re travelling, the more powerful the punch – so build momentum with Grapple Fist before releasing. Charging stops Loader’s sprint, but you can resume running while holding down the button. This attack can kill almost any non‑boss enemy in one hit and deals heavy damage to bosses when timed correctly.
Thunder Gauntlet (Utility – Alternate)
Unlocked through the Earthshatter challenge (as Loader, land a Charged Gauntlet hit at 300 mph or higher), Thunder Gauntlet charges up a single‑target punch for 2100 percent damage and unleashes lightning that deals 1000 percent damage in a cone behind the target. It charges faster than the standard Charged Gauntlet and automatically fires when fully charged. Thunder Gauntlet is ideal for dealing with clustered enemies, as the cone can electrocute multiple foes. To reach the required 300 mph speed for the Earthshatter challenge, combine Grapple Fist with launch pads or downward punches during a long fall.
M551 Pylon (Special)
Loader throws a floating pylon that zaps up to six nearby enemies for 100 percent damage over several seconds. You can grapple to the pylon like a normal surface, gaining elevation or repositioning quickly. The pylon doesn’t scale with attack speed, but you can have multiple active with cooldown reduction items. Use it to provide passive damage while you focus on punching enemies or to create a grappling anchor mid‑air.
Thunderslam (Special – Alternate)
Unlocked by completing the Thunderdome challenge (kill three other Loaders in Bulwark’s Ambry), Thunderslam makes Loader slam her fists into the ground, dealing 2000 percent damage in a radius and stunning anything caught in the blast. The challenge requires activating the Artifact of Vengeance in Sky Meadow, entering Bulwark’s Ambry, and defeating three Loader clones. This ability excels at crowd control and pairs well with Thunder Gauntlet; use Thunderslam to stun a group before zapping them with a lightning punch.
Unlocking Loader’s Alternate Skills
Unlocking Loader’s alternate abilities adds depth to her kit. Each skill requires a specific challenge that tests different aspects of her playstyle:
- Swing By (Spiked Fist) – Reach the Celestial Portal in 25 minutes or less as Loader. The timer pauses in certain zones like the Bazaar Between Time, so use these to manage time. Looping early or using the Artifact of Command to pick efficient items can help you reach the portal faster.
- Earthshatter (Thunder Gauntlet) – Land a Charged Gauntlet hit at 300 mph or higher. Build speed by grappling to the ground from a height, using launch pads, or combining Grapple Fist with movement items like Energy Drinks or Paul’s Goat Hoof. Release the punch just before impact.
- The Thunderdome (Thunderslam) – Kill three Loader clones in Bulwark’s Ambry. Activate the Artifact of Vengeance by inputting its code in the Compound Generator on Sky Meadow, complete the trial, and defeat the Loader Umbrae that spawn after each activation. Be careful not to let drones or turrets steal your kills, as only your blows count toward the challenge. Bringing an item like Dio’s Best Friend can give clones an extra life, allowing multiple kills per clone.
Completing these challenges broadens Loader’s capabilities. In my experience, Spiked Fist offers the most immediate impact because the added damage and pull make grappling an offensive tool. Thunder Gauntlet and Thunderslam require more setup but provide powerful area damage for dealing with crowds and elite enemies.
Best Items and Builds for Loader
Loader thrives on momentum and melee combat, so you should prioritise items that boost speed, attack frequency, and survivability. Two core builds are popular among players:
Attack Speed Build
This build aims to swing more often, generate barriers quickly, and maintain constant uptime on your skills. Key items include:
- Lens Maker’s Glasses – Increases critical hit chance. Stack multiple copies to raise your crit rate to 100 percent for reliable damage.
- Backup Magazine – Grants additional secondary charges, allowing more frequent Grapple Fist or Spiked Fist uses. More grapples mean more mobility and barrier generation.
- Energy Drinks and Paul’s Goat Hoof – Boost sprint speed, letting you build momentum faster for Charged Gauntlet attacks. Speed also helps you dodge incoming damage.
- War Horn and Gesture of the Drowned (paired with a spinel tonic) – When combined with fuel cells, these items reduce cooldowns and massively increase attack speed after using equipment. This synergy lets Loader chain punches and grapples at blistering pace.
- Predatory Instincts and Focus Crystal – Additional critical chance and melee damage bonuses, respectively, further amplify Loader’s damage. Focus Crystal deals extra damage to enemies within 13 meters, which complements her close‑range play.
With this build, you stay in the enemy’s face, constantly punching and grappling to maintain your barrier. Be wary of items like Shaped Glass that halve your health; while they boost damage, they reduce your survivability, which can be risky when playing up close.
One‑Shot Build
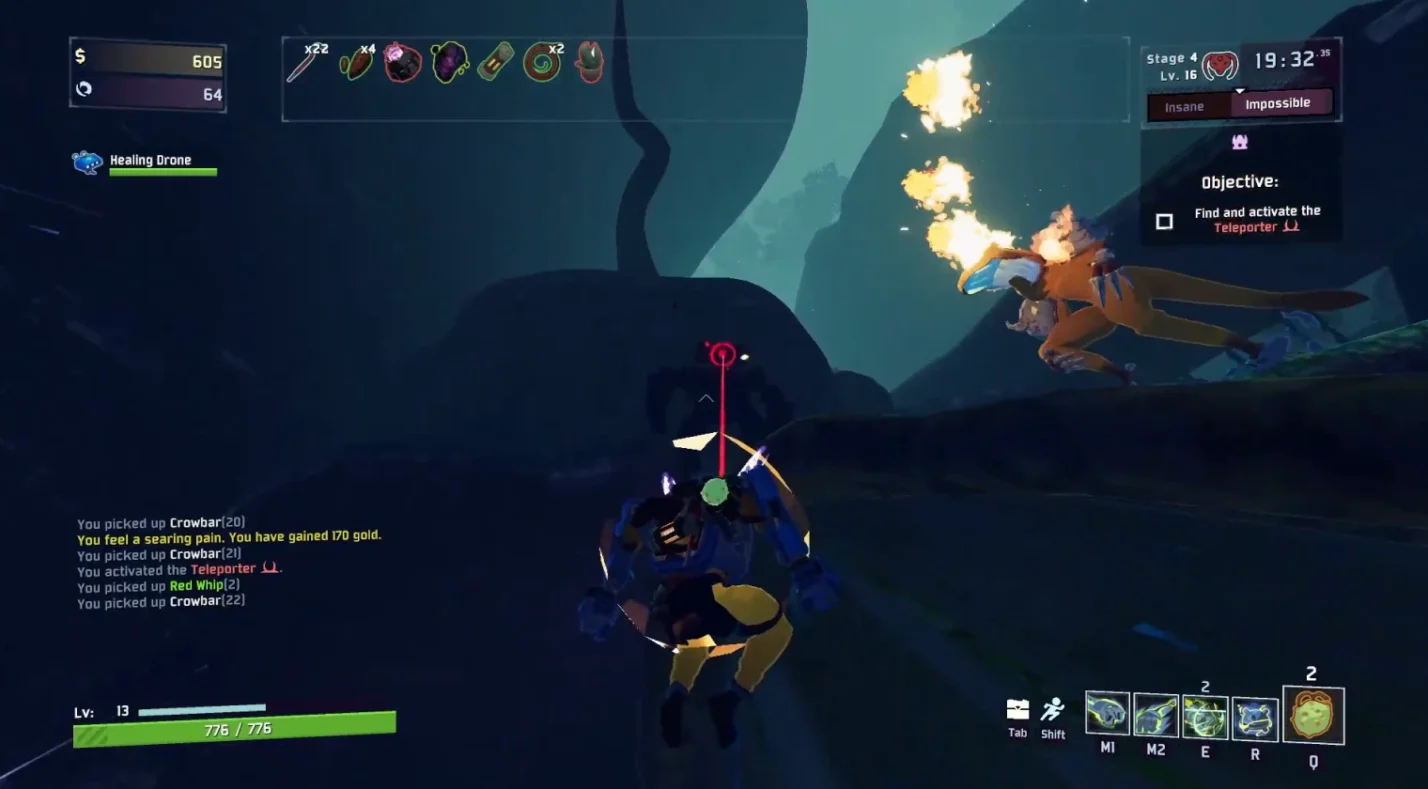
If you prefer landing single devastating blows, the One‑Shot build focuses on maximizing Charged Gauntlet and Thunder Gauntlet. Prioritise items that increase base damage and amplify your first hit:
- Crowbar – Increases damage to enemies above 90 percent health. Multiple Crowbars stack, enabling you to annihilate bosses or elites with a single punch.
- Focus Crystal and Kjaro’s Band – Focus Crystal enhances melee damage, while Kjaro’s Band adds a fire tornado on high‑damage hits, dealing extra burn damage over time.
- ATG Missile Mk. 1 and Will‑o’-the‑Wisp – Items that trigger additional explosions or missiles on hit scale with Charged Gauntlet’s huge damage, clearing groups around your target.
- Backup Magazine – Still valuable here because extra grapples let you build momentum and reposition after a punch.
- Alien Head or Fuel Cell – Reduces cooldowns or adds charges to your equipment, allowing more frequent use of powerful equipment like Unstable Tesla Coil or Preon Accumulator.
In a One‑Shot build, you spend more time charging up and lining your punches. Use Grapple Fist to accelerate, release Charged Gauntlet at peak speed, and watch enemies evaporate. Because you rely on singular hits, invest in survivability items like Tougher Times (bear) and Infusion to avoid being overwhelmed during cooldowns.
Tips for Playing Loader
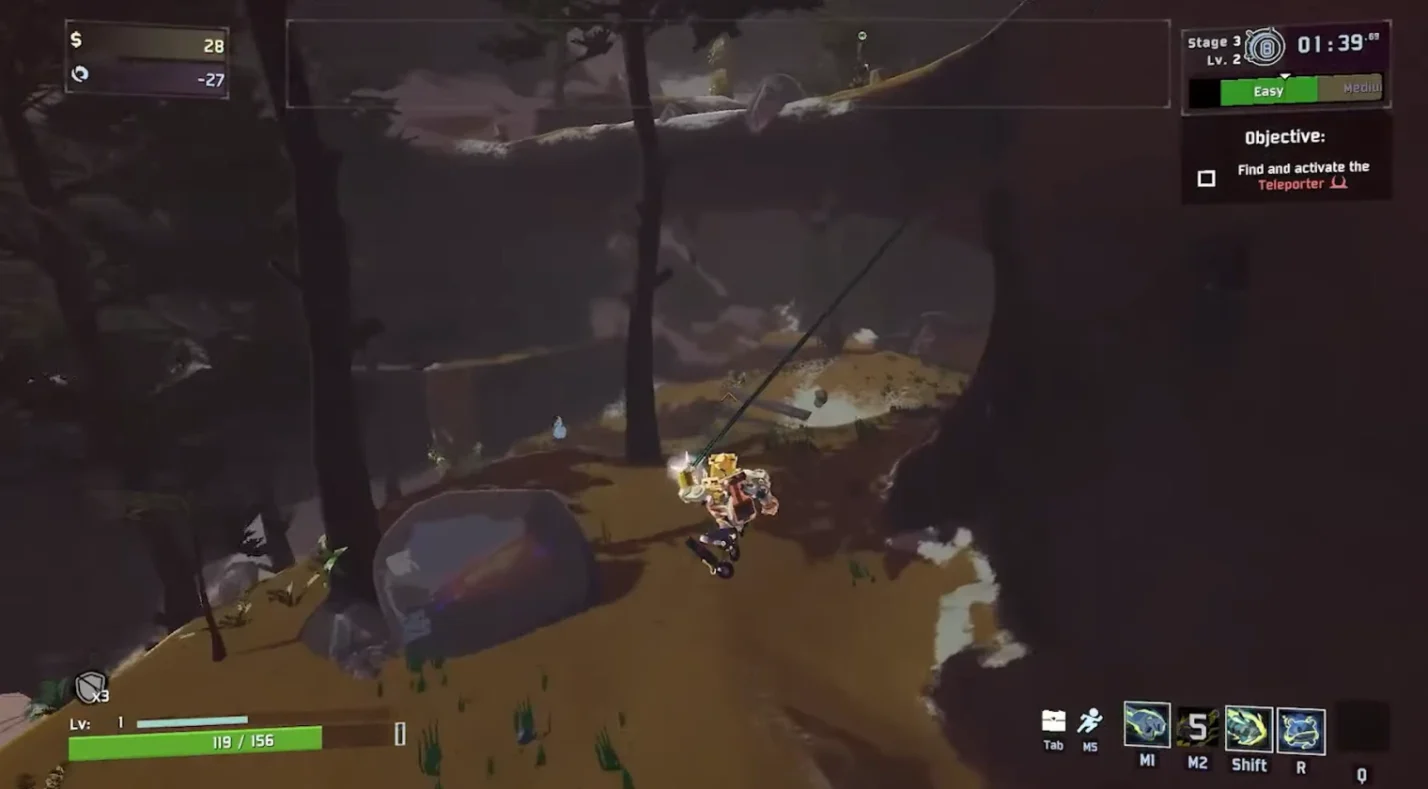
Mastering Loader requires understanding her unique momentum‑based combat. These tips will help you leverage her strengths and mitigate her weaknesses:
- Use terrain to build speed. Loader’s grappling hooks attach to nearly any surface, including pylons and airborne enemies. Swing across chasms, up cliffs, or around pillars to build momentum. Releasing a Charged Gauntlet punch at the apex of a swing maximises damage.
- Keep your barrier up. Scrap Barrier is essential for survivability. Chain Knuckleboom swings and grapples to maintain a constant shield. When your barrier drops, back off briefly to regenerate or grab a healing item.
- Prioritise mobility items. High movement speed items improve every part of Loader’s kit. Energy Drinks, Paul’s Goat Hoof, and Wax Quail (extra boost on jump while sprinting) make it easier to manoeuvre and charge punches. Striders have suggested stacking Goat Hoofs early for a noticeable difference.
- Pay attention to cooldowns. Grapple Fist and Charged Gauntlet have five‑second cooldowns. Combine them creatively; for example, grapple to an enemy, release the grapple early to reset its cooldown, then punch another target.
- Avoid constant use of the pylon. While M551 Pylon provides extra damage, its long cooldown and limited scaling mean you should deploy it strategically, such as before a boss or to create a grapple anchor mid‑air.
- Be mindful of item sharing in co‑op. Loader scales extremely well with certain items, but hogging all the movement and damage items can hinder teammates. Share lenses, goat hooves, and utility items so the whole team scales effectively. Our roundup of the best co‑op games highlights how cooperative dynamics elevate experiences; Risk of Rain 2 is no exception, and playing generously keeps runs fun for everyone.
Co‑Op Synergy and Team Strategies
Loader shines in multiplayer because her high damage and mobility complement other survivors. Here’s how to integrate her into a team:
- Fill the melee bruiser role. Loader’s job is to dive into the thick of enemies, draw aggro, and punch elites. Meanwhile, ranged characters like Huntress or Railgunner can snipe from a distance.
- Stack complementary items. If your team has survivors who benefit more from on‑hit effects, prioritise those for them and focus on movement and damage items for yourself. In return, they should let you take Focus Crystals and other melee‑oriented items.
- Communicate when tackling nests. When attempting to unlock Loader, coordinate with your team before destroying the fifth nest. Make sure everyone is ready for the boss fight and has healing or escape routes planned.
- Use Loader to gather items quickly. In early stages, Loader’s grappling mobility lets her reach chests and shrines faster. Grab items and share them with slower teammates. Rapid chest clearing accelerates the run’s power curve, which is essential for higher difficulties.
- Coordinate with artifacts. The Artifact of Command makes unlocking alternate skills easier because you can pick specific items to reach speed thresholds or survivability. On the other hand, the Artifact of Vengeance (required for Thunderdome) significantly raises the difficulty by spawning doppelgangers. Plan accordingly and only bring it when your team is prepared.
Our article on the best roguelite games notes that Risk of Rain 2 thrives on exponential growth; co‑op runs snowball when survivors synchronise builds and share loot. Knowing Loader’s role within this dynamic helps your group exploit power spikes without leaving anyone behind.
Where to Get Risk of Rain 2 and Expansions
Unlocking Loader is just the beginning – the real fun comes from experimenting with different survivors, artifacts, and modes. If you don’t own the game yet or want to pick up expansions, Eneba offers secure deals and digital keys for multiple platforms. You can find the base game, the Survivors of the Void DLC, and bundles that include future content. Purchasing through Eneba supports the Hub’s editorial work and often saves you money compared to other stores.
When you’re ready to jump in, grab a Risk of Rain 2 Steam key or gift card from our marketplace. The DLC adds new survivors, including the railgun‑wielding Railgunner and the poison‑spitting Void Fiend, plus fresh stages and items that diversify runs. With new characters and mechanics, there’s always something else to master after unlocking Loader.
Master Loader and Claim Your Victory
Learning how to unlock Loader in Risk of Rain 2 transforms the way you approach the game. The Guidance Offline challenge introduces you to Siren’s Call’s hidden secrets and pushes you to adapt to the Alloy Worship Unit’s deadly attacks. Once unlocked, Loader rewards your effort with explosive melee damage, grappling mobility, and the ability to one‑shot elites. By mastering her default kit and unlocking her alternate skills, you can tailor her playstyle to suit your preferences, whether you enjoy sustained brawls or single powerful blows.
Building Loader effectively involves stacking the right items and understanding how her speed translates into damage. Choose between attack speed and one‑shot builds, mix and match according to the items that drop, and communicate with teammates to maximise the entire squad’s potential. The game’s roguelike nature ensures every run feels different, but Loader’s core strengths – immunity to fall damage, barrier generation, and mobility – remain consistent tools for success.
Now that you know how to bring Loader into the fray, it’s time to smash through Siren’s Call, punch that Alloy Worship Unit into scrap, and take your runs to new heights.
FAQs
How do you unlock Loader in Risk of Rain 2?
To unlock Loader in Risk of Rain 2, you must complete the Guidance Offline challenge by reaching Siren’s Call, destroying five vulture nests, and defeating the Alloy Worship Unit boss. Once the boss is down, Loader becomes available.
What is the Guidance Offline challenge in Risk of Rain 2?
The Guidance Offline challenge is a hidden objective that requires defeating the Alloy Worship Unit in Siren’s Call. You first destroy five blue vulture nests on the map to summon the boss, then beat it to complete the challenge.
How do you unlock Loader’s alternate abilities?
To unlock Loader’s alternate abilities, complete specific challenges: Swing By for Spiked Fist (reach the Celestial Portal within 25 minutes), Earthshatter for Thunder Gauntlet (land a Charged Gauntlet hit at 300 mph or more), and Thunderdome for Thunderslam (kill three Loader clones in Bulwark’s Ambry).
Is Loader good in Risk of Rain 2?
Yes, Loader is considered one of the strongest survivors because she’s immune to fall damage, generates shields by hitting enemies, and delivers enormous burst damage through her gauntlets. She excels at both mobility and survivability when built correctly.
What items are best for Loader in Risk of Rain 2?
The best items for Loader depend on your build. Attack speed builds prioritise Lens Maker’s Glasses, Backup Magazines, Energy Drinks, and Paul’s Goat Hoof, while one‑shot builds favour Crowbars, Focus Crystals, Kjaro’s Band, and ATG Missiles to maximise burst damage.