


How To Learn GameMaker Studio 2: A Beginner’s Roadmap for 2026

Eneba Hub contains affiliate links, which means we may earn a small commission if you make a purchase through them—at no extra cost to you. Learn more


START WITH A SMALL GAME
Learning references include the GameMaker Studio 2 tutorial hub, Sara Spalding's beginner guide, and named Udemy courses.
A small 2D project shows you how to learn GameMaker Studio 2 through visual logic and GameMaker Language, or GML. This approach suits hobbyists, students, and aspiring indie developers.
Free tutorials are a sensible starting point before paying for instruction. Course length measures lesson content, not your personal learning time, and the GameMaker Studio 2 price for commercial use is a separate consideration from course spending. A finished, modest project is a better learning target than an unsupported deadline.
The path below explains how to learn GameMaker Studio 2 with tools, guided lessons, practice projects, and advice on mistakes to avoid.
Jump to:
GameMaker Studio 2 at a Glance
Learning GameMaker Studio 2 works best as project-based practice. These facts help you judge the commitment without treating a course runtime as a completion deadline.
|
Cost to start |
Free tutorial resources; engine licensing and paid instruction are separate purchases |
|---|---|
|
Time to learn the basics |
Progress depends on practice and project scope, not lesson runtime alone |
|
What you need |
A compatible computer, the engine, and a willingness to troubleshoot |
|
Main hurdles |
Connecting sprites, objects, events, rooms, and GML |
|
Beginner suitability |
High – visual logic offers an entry point before more extensive coding |
Keep the GameMaker Studio 2 price separate from your learning-resource budget. First decide what you want to build.
What You Can Actually Build With GameMaker Studio 2
GameMaker Studio 2 is a game-development engine suited to 2D games, including platformers, arcade shooters, and role-playing games. Your first GameMaker Studio 2 games should demonstrate a complete play loop: an action, a consequence, and a way to finish or restart.
The GameMaker tutorial hub offers beginner paths across these categories:
- Platformers: Build a character who moves across platforms and reacts to obstacles. Make Your First Platformer in GameMaker provides a focused starting point. Keep the first level short enough that you can test every jump and explain each collision rule.
- Arcade shooters: Practice directional movement, projectiles, and enemy behavior through Make Your Own Arcade Space Shooter. A compact arena lets you concentrate on how objects interact before adding elaborate art or progression.
- Role-playing games: Use Make Your Own Role-Playing Game as a route into connected systems. Begin with a scene where a character explores and interacts with something. A sprawling world can wait until those interactions work.
These are practical starting points for GameMaker Studio 2 games because they make errors visible. A character passes through a wall, a projectile misses its target, or an interaction fails to trigger.
Readers arriving through the older “Game Maker Studio” name should match the tutorial’s interface and syntax, the rules for writing code, to their installed version. Familiar labels alone don’t make an old Game Maker Studio lesson compatible.
Learn GameMaker Studio 2 by completing a small example in a category you enjoy. Then change a mechanic to test your understanding. Successful GameMaker Studio 2 games need coherent rules before they need large amounts of content.
How To Learn GameMaker Studio 2: What You Need Before You Start
Start with the engine and a beginner resource. Custom art software and paid instruction can follow once you understand the editor.
Prepare these essentials before learning GameMaker Studio 2:
- Engine access: Use the official tutorial hub for installation guidance and instructions that match your version.
- Simple artwork: Start with placeholder shapes. Aseprite is an optional pixel-art tool, not a prerequisite for learning movement.
- Learning reference: Choose an official tutorial or Sara Spalding’s Beginner’s Guide to GameMaker on YouTube.
- Coding approach: Treat GML as a way to express rules you already understand through visual actions.
The tools serve different purposes, so compare their roles before purchasing anything.
|
Tool |
Best for |
Price |
|---|---|---|
 |
Structured instruction and follow-along projects |
Paid |
 |
Building and testing the game |
Free for non-commercial use; paid commercial licensing |
 |
Optional custom pixel art and animation |
Paid |
 |
Free video explanations and demonstrations |
Free |
A course purchase doesn’t cover the GameMaker Studio 2 price or an art-tool license. Search results labeled “Game Maker Studio” may also point to older material, so prioritize version compatibility over a familiar title.
How To Learn GameMaker Studio 2: A Step-by-Step Path
Learn GameMaker Studio 2 through a small finished project, with short experiments between lessons. Advance when you can explain and change the behavior, rather than when the video ends.
Step 1: Install GameMaker Studio 2 and Start the Official Tutorials
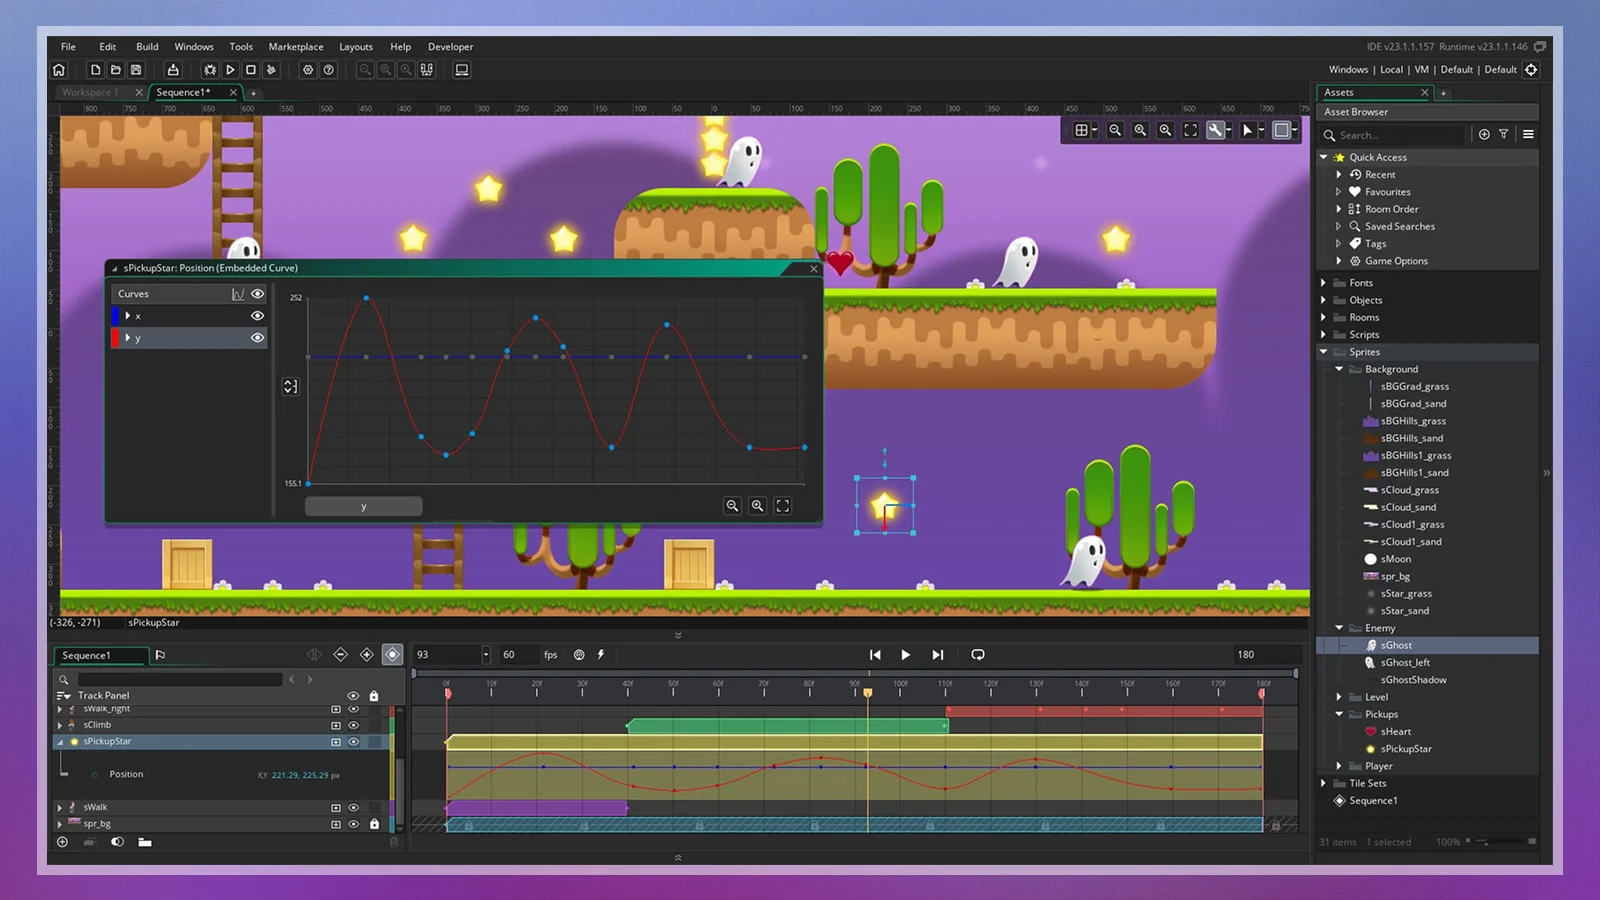
Open the official tutorial hub and begin with How to Get Started with GameMaker in 2026. Follow its setup guidance, create a practice project, and locate the resource browser and workspace.
Keep this project disposable so you can experiment without protecting every change. As you learn GameMaker Studio 2, write down unfamiliar labels and find their meaning in the lesson. Stop after each action and reproduce it yourself. The goal is to become comfortable moving around the editor before building complicated mechanics.
Step 2: Learn Sprites, Objects, and Rooms
Create a sprite, assign it to an object, and place an instance of that object in a room. A sprite supplies an image; an object defines behavior; an instance is a placed occurrence of that object; and a room is the space where play happens.
Use Sara Spalding’s Beginner’s Guide to GameMaker to reinforce those distinctions. Change the sprite’s appearance, then change the object’s behavior. Learning GameMaker Studio 2 becomes easier when you can identify which resource controls the result on screen.
Step 3: Practice Movement and Collision
Build movement before adding enemies or elaborate menus. Follow the official How To Move And Collide In GameMaker or How To Make Platformer Movement In GameMaker tutorial, then reproduce the relevant behavior in your practice room.
Collision means detecting contact and deciding how objects respond. Test walls, corners, and repeated input instead of checking only a clear path. When something fails, isolate the behavior in a simpler room. This habit helps you learn GameMaker Studio 2 without burying each bug beneath unrelated systems.
Step 4: Write Your First GML Code
Translate a familiar action into GML rather than starting with an unfamiliar game system. Use a variable, a named value the game can store and change, to control movement speed. Then use a condition to decide when an action runs.
Explain each instruction in plain language before changing it. Learning GameMaker Studio 2 is easier when each coding lesson connects syntax to visible behavior. The course Learn to Code in Game Maker Language offers coding instruction, but its older material needs careful comparison with your installed version.
Step 5: Finish and Share a Small Project
Finish a short platformer using Make Your First Platformer in GameMaker, or follow a first-game course that suits your level. Add a clear objective and a restart path before adding more levels.
Small GameMaker Studio 2 games are useful learning projects because you can inspect the whole experience. Ask another person to play without instructions, then observe where they become confused. Share the project through an appropriate community, like r/gamemaker, and request feedback on a specific behavior.
Close the project by fixing a clear problem from that feedback.
Courses That Speed Up Learning GameMaker Studio 2
A structured course can organize how to learn GameMaker Studio 2, but version fit and prerequisites should decide your purchase. A longer catalog entry isn’t automatically the better beginner choice.
Become a video game developer with Gamemaker Studio 2.3 on Udemy offers a broad project-based option. Its title identifies the engine version it teaches.
The Udemy catalog lists the durations below. These measure instruction, not the time you’ll spend practicing.
|
Course |
Provider |
What It Covers |
Duration |
|---|---|---|---|
|
Become a video game developer with Gamemaker Studio 2.3 |
|
A broader game-development learning path |
17.5 hours |
|
Your First Game in Gamemaker |
|
Building a first complete game |
8 hours |
|
Learn to Code in Game Maker Language |
|
GML coding fundamentals |
3.5 hours |
|
Beginner’s Guide to GameMaker |
|
Sprites, objects, and rooms |
30 minutes |
|
Make Your First Platformer in GameMaker |
|
Building a short platformer |
15 minutes |
Compare the Game Maker Studio syntax in Learn to Code in Game Maker Language with your installed version before applying its examples.
Practice Projects for Learning GameMaker Studio 2
Practice makes concepts stick when each project introduces a manageable problem. Learning GameMaker Studio 2 through these projects gives you a progression without requiring a large original game.
Complete these five practice projects in order, keeping each earlier project available as a reference:
- Collision test room: Move a placeholder character around solid obstacles. This teaches object placement, movement rules, and the difference between detecting contact and responding to it. Explain why the character stops before moving on.
- Short platformer level: Add jumping, platforms, and an exit. Use the official platformer tutorial as a reference, then arrange your own obstacles. GameMaker Studio 2 games become easier to debug when the level is small enough to inspect completely.
- Arcade shooter arena: Add projectiles and targets in a contained space. This teaches object creation, removal, and interactions. Focus on predictable behavior before adding decorative effects or extra enemy types.
- Small RPG scene: Build an explorable room with an interaction. This teaches how game state, the information describing the current situation, changes after an action. Keep the dialogue and map modest.
- Custom-art revision: Replace a completed project’s placeholders with sprites made in Aseprite or the artwork workflow you prefer. Check collision alignment after changing the images. This teaches why visual size and collision behavior need separate attention.
Use these GameMaker Studio 2 games as evidence of what you understand, not as a contest in project size. A “Game Maker Studio” tutorial is useful only if you can apply its lesson independently afterward.
Where Most Beginners Get Stuck Learning GameMaker Studio 2
Beginners can stall when project complexity outruns understanding. Learn GameMaker Studio 2 by resolving a specific problem before introducing another system.
Use these fixes to keep the workload manageable:
- Jumping into intermediate material: Finish introductory work before attempting procedural systems. Procedural Characters in GameMaker 2 requires intermediate familiarity. An appealing result doesn’t remove that prerequisite, so choose a simpler lesson if you cannot explain the setup.
- Copying code without changing it: Alter a familiar value, predict the result, and run the project. This turns a copied example into an experiment. Old “Game Maker Studio” code deserves extra care because syntax and recommended workflows can differ.
- Never finishing a project: Define a playable endpoint before adding content. GameMaker Studio 2 games don’t need extensive maps to teach completion. An objective, feedback, and a restart path give you something another person can evaluate.
- Paying before trying free instruction: Start with the official hub and Sara Spalding’s beginner video. Purchase a course when you can name the gap it addresses, like collision logic or finishing a platformer, rather than hoping a purchase supplies motivation.
- Confusing instruction with licensing: Treat the GameMaker Studio 2 price as an engine decision, separate from any course or artwork purchase. Read the license terms for your intended use before committing to publication.
A smaller test project is often the useful next move when progress on GameMaker Studio 2 games stops. Reproduce the bug, remove unrelated features, and change a specific cause.
Final Verdict on GameMaker Studio 2
GameMaker Studio 2 fits beginners who want to focus on finishing a small 2D game. Start with the official tutorials, use placeholder artwork, and learn GML through behaviors you already understand. That path keeps spending tied to a clear need.
Readers focused on 3D should consider Godot or Unity instead. Existing coding experience is also a reason to compare engines before committing, though it doesn’t make this engine unsuitable. The GameMaker Studio 2 price belongs in that decision alongside the workflow and intended publishing route.
A practical plan for how to learn GameMaker Studio 2 starts with a modest project whose rules you can explain and change independently. Choose paid instruction when it addresses a specific gap.
FAQs
Follow a beginner tutorial, finish a small 2D game, and change one mechanic without copying the lesson. Use visual logic to understand the behavior, then translate familiar actions into GML.
Yes. GameMaker is free for non-commercial use, and beginners can learn through the official GameMaker tutorials and Sara Spalding’s Beginner’s Guide to GameMaker. Commercial publishing requires paid licensing.
No, visual logic in Game Maker Studio offers a starting point without prior coding experience. Learn GML as you progress so you can express more complex rules and understand code-based tutorials.
Yes, if you want to make 2D games and enjoy its workflow. Compare the GameMaker Studio 2 price and publishing terms with your needs; consider another engine if 3D is your priority.
Start with a compatible computer, GameMaker Studio 2, and a beginner tutorial. Aseprite is optional for custom artwork, while Udemy and YouTube provide instruction rather than game-building software.
You can build platformers, arcade shooters, and role-playing games; the official tutorials cover those categories. Building a small example is a practical way to explore how to learn GameMaker Studio 2.