



How to Host a Minecraft Server: Complete Guide for 2026

Eneba Hub contains affiliate links, which means we may earn a small commission if you make a purchase through them—at no extra cost to you. Learn more


Recent update
This article is regularly updated to match what’s trending and in-demand among gamers.
If you’re figuring out how to host a Minecraft server, the good news is it’s far more accessible than most players expect. Minecraft has sold over 350 million copies worldwide, and at some point every serious player wants a world they actually control, free from someone else’s rules, restarts, and server queues.
I’ve been hosting for my group for three years, working through self-hosting on a desktop PC, free platforms like Aternos, and eventually commercial hosting as our community grew. Through trial and error, I found there are several practical ways to host a Minecraft server, from zero-cost setups to paid plans built for 50-player modded communities.
This guide covers all of them – self-hosting on your PC, free services, modded servers, and commercial providers – so you can pick whatever fits your budget, skill level, and player count.
Jump to:
Understanding Minecraft Server Hosting Options
Before you jump into setup, you need to understand the main hosting methods available. Each approach has distinct advantages and trade-offs that affect cost, performance, and ease of use.
Self-Hosting on Your PC
Running a server directly from your computer is the most hands-on approach. You download the server software, configure it yourself, and maintain complete control over every setting. The advantage here is clear: it’s completely free beyond your existing internet and electricity costs.
I started this way with a spare desktop running 24/7 in my closet. The setup taught me more about server management than any guide could, but it came with real limitations. Your PC must stay on whenever players want to join, and your home internet bandwidth becomes the bottleneck. When my internet went down during a storm, my entire server disappeared until power returned.
Free Hosting Services
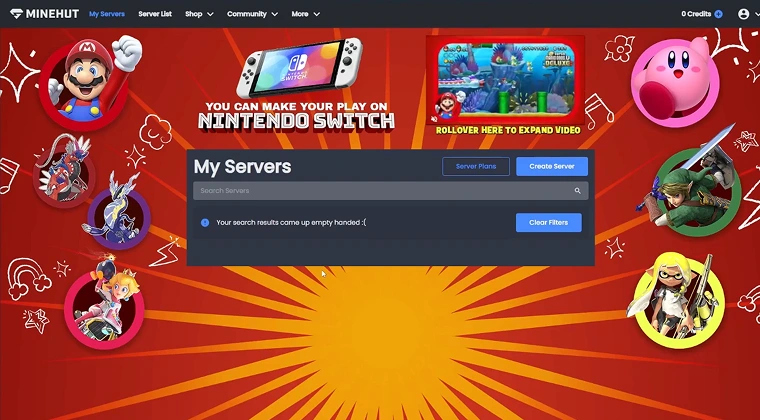
Platforms like Aternos, Minehut, and Server.pro offer free Minecraft server hosting with no upfront costs. These services appeal to players who want to test multiplayer gameplay without financial commitment.
The catch? Free hosting comes with significant restrictions. Server queues can take 10 to 15 minutes during peak hours, automatic shutdowns after periods of inactivity, limited RAM allocation, and performance throttling. My group tried Aternos first, and while it worked for testing, the lag became unbearable once we installed mods.
Paid Commercial Hosting
For a more “set it and forget it” experience, commercial hosting from providers like Godlike.Host, Hostinger, Shockbyte, and ScalaCube is the go-to. For a full breakdown of providers across every budget, our guide to reliable Minecraft server hosting goes deeper than the summary here.
Most entry plans land around $2–$6/month, though exact pricing depends on promos, region, and billing cycle. These services handle server setup, provide 99.9% uptime guarantees, offer technical support, and scale as your community grows.
The benefit is reliability. When I switched our server to commercial hosting, connection issues vanished and performance stabilized even with 15 players online simultaneously.

Hamachi and VPN Solutions
If you want to know how to host a Minecraft server with Hamachi, this method creates a virtual private network that makes Minecraft treat remote players as if they’re on the same local network. This bypasses port forwarding entirely.
It works for small groups, typically under 5 players, but introduces its own complications. Network speeds suffer, connection stability decreases, and the free Hamachi version limits you to 5 devices. Learning how to host a private Minecraft server through Hamachi takes minutes, but the performance trade-offs make it suitable only for temporary sessions.
Here’s a quick comparison:
| Hosting Method | Cost | Ease of Setup | Performance | Best For |
|---|---|---|---|---|
| Self-Hosting on PC | Free | Medium | Variable | Tech-savvy players, small groups |
| Free Hosting Services | Free | Easy | Limited | Testing, casual play with 2-5 friends |
| Paid Commercial Hosting | $3-$15/month | Very Easy | High | Serious communities, modded servers |
| Hamachi/VPN | Free | Easy | Limited | Quick sessions, temporary servers |
The best choice depends on player count, budget, technical comfort level, and desired performance. A group of 3 friends playing vanilla survival might thrive on free hosting. A community of 20 players running modpacks needs commercial hosting.
How to Self-Host a Minecraft Server on Your PC
If you want to know how to self-host a Minecraft server, this section covers everything you need. Self-hosting a Minecraft Java Edition server on your PC gives you complete control without monthly fees. The process requires some technical steps, but nothing too complicated if you follow each one carefully. Learning how to host a dedicated Minecraft server from home means understanding both the software and networking requirements.
Step 1: Download the Server Software
Start by visiting minecraft.net/download/server to download the official Minecraft server JAR file. This is the core software that runs your server. The file is small, usually under 50 MB, and downloads within seconds on most connections.
Save the server.jar file to a dedicated folder. I recommend creating something like “C:\MinecraftServer” on Windows or “~/MinecraftServer” on Mac/Linux. Keeping everything in one folder makes management much easier.
Step 2: Check System Requirements
Your hardware determines how many players your server can handle smoothly. For 5 to 10 players on vanilla Minecraft, you need:
- At least 1 to 2 GB of RAM allocated to the server
- A CPU with decent single-core performance (2 GHz or higher)
- 5 GB of disk space minimum for world files
- Stable internet connection with upload speeds of at least 10 Mbps
If you’re planning to host on a laptop, check out our guide on the best laptop for Minecraft to ensure your hardware meets server hosting requirements. Modded servers demand significantly more resources. When I ran a modded server with 40 plugins, RAM usage jumped to 4 GB even with just 8 players online.
Step 3: Install Java
Minecraft Java servers need a recent Java version. For Minecraft 1.20.5 and newer, install Java 21. For 1.18–1.20.4, Java 17 is usually the right choice.
Download Java from a reputable distro such as Eclipse Temurin (Adoptium) (avoid relying on java.com, which often serves older versions). After installing, open Command Prompt/Terminal and check:
java -version
If the command prints Java 17 or 21 (matching your server version), you’re good to go.
Step 4: Configure Server Properties
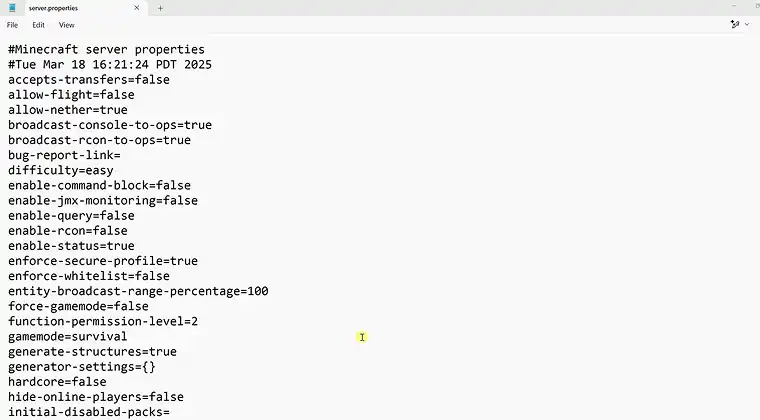
Inside your server folder, you’ll find a file called server.properties after the first launch. This text file controls every aspect of your server’s behavior.
Open it with any text editor and customize settings like:
- max-players: How many people can join simultaneously
- gamemode: Survival, creative, or adventure mode
- difficulty: Peaceful, easy, normal, or hard
- pvp: Enable or disable player combat
- view-distance: How many chunks load around players (affects performance)
I learned through experience that reducing view-distance from 10 to 8 improves performance significantly without noticeably affecting gameplay.
Step 5: Accept the EULA
When you first try to run the server, it creates a file called eula.txt. Open this file and change “eula=false” to “eula=true”. This indicates you accept Minecraft’s End User License Agreement. The server won’t start until you complete this step.
Step 6: Launch the Server
Create a batch file (.bat on Windows) or shell script (.sh on Mac/Linux) to launch your server with proper memory allocation. Here’s a basic example:
java -Xmx2G -Xms1G -jar server.jar nogui
This allocates 2 GB maximum RAM and 1 GB starting RAM to your server. Double-click the batch file to start the server. You’ll see lots of text as the server generates the world and loads everything.
Step 7: Connect to the Server
On your own computer, launch Minecraft, select Multiplayer, then Direct Connect. Type “localhost” as the server address. You should load in right away – that’s the easiest way to confirm everything works and learn how to host a local Minecraft server before inviting anyone else.
Now, how to host a multiplayer Minecraft server for your friends? They’ll need your public IP address (find it at whatismyip.com) followed by “:25565” (the default Minecraft port). For example: “123.456.789.012:25565”.
This only works after you configure port forwarding, which we’ll cover in detail later.
Allocate at least 1 to 2 GB of RAM to your Minecraft server for smooth performance with 5 to 10 players. Use a batch file (.bat) or shell script (.sh) to automate server startup, eliminating the need to remember complex command-line syntax every time you launch.
How to Host a Minecraft Server for Free in 2026 (Top 3 Free Options)
Free hosting services provide a legitimate way to run a Minecraft server without spending money. These platforms work well for small groups and testing purposes, but come with important limitations you should understand before committing.
Legitimate Free Hosting Options
If you want to host a Minecraft server for free, these three platforms are the most reliable options available right now. Each has its own strengths – here’s how they compare at a glance.
| Provider | Free Player Limit | Mod Support | Queue Times | Best For |
|---|---|---|---|---|
| Aternos | Unlimited (performance-limited) | Yes | Up to 15 mins peak | Modded servers on zero budget |
| Minehut | Up to 10 players | Plugins only | Short | Small groups, quick setup |
| Server.pro | 3–5 active players | Limited | Minimal | Beginners testing server hosting |
All three make it genuinely possible to host a Minecraft server for free, but each comes with trade-offs. Read on for the full breakdown of limitations before you commit.
Common Limitations of Free Hosting
Every free hosting service makes trade-offs to offer no-cost servers:
- Limited player slots: Most cap at 10 to 12 players, though some advertise “unlimited” with performance caveats
- Performance throttling: Shared server resources mean lag during peak usage times
- Automatic shutdowns: Servers turn off after periods of inactivity to save resources
- Queue systems: Popular services require waiting for server slots to open up
- Storage limits: World size restrictions prevent massive builds or extensive exploration
- Advertisement requirements: Services like Aternos display ads to fund operations
When I tested Aternos for our modded server, the 15-minute startup queue frustrated players who wanted to join spontaneously. The server worked fine for scheduled game sessions, but spontaneous play sessions became impossible.
When Free Hosting Makes Sense
Free hosting suits specific situations well:
- Testing server concepts before investing in paid hosting
- Small friend groups (2 to 5 players) playing casually
- Learning server management without financial risk
- Temporary servers for specific events or projects
- Budget constraints that make paid hosting impossible
It doesn’t work well for:
- Active communities expecting 24/7 availability
- Modded servers with heavy resource requirements
- Groups larger than 10 players
- Players who value consistent performance over cost savings
Free vs Paid Minecraft Server Hosting: Which Is Right for You?
Knowing how to host a Minecraft server for free is useful, but free isn’t always the right call. Here’s a quick breakdown to help you decide.
| Free Hosting | Paid Hosting | |
|---|---|---|
| Cost | $0 | From $2.00/mo |
| Uptime | Shuts down when inactive | 24/7 guaranteed |
| Performance | Shared, can lag | Dedicated resources |
| Player Capacity | 10–12 max | 20+ depending on plan |
| Mod Support | Limited | Full support |
| Setup Time | Queue delays possible | Instant |
| Support | Community forums | Direct 24/7 support |
Choose free hosting if you’re testing the waters, running a small casual group of 2–5 friends, or working with a tight budget.
Choose paid hosting if your community is growing, you’re running mods, or you need reliable 24/7 uptime without queue times or performance drops. If budget is still a concern, our budget Minecraft server hosting guide shows you how to get solid performance without overpaying.
The good news is that starting free and upgrading later is always an option; all three paid providers in our comparison table above make migration straightforward.
How to Host a Modded Minecraft Server
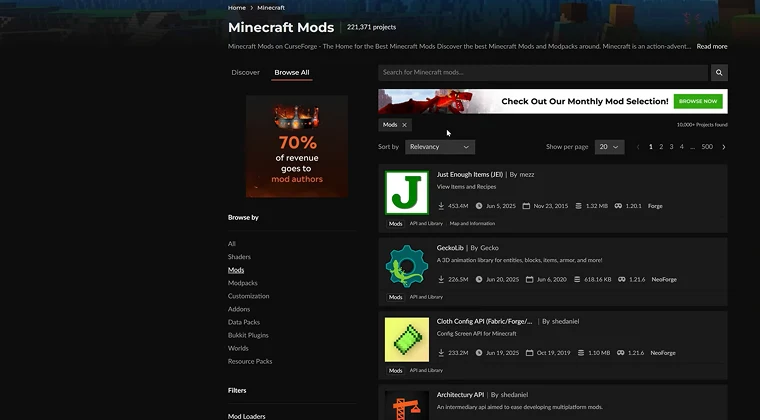
If you’re trying to figure out how to host a modded Minecraft server, the first thing to know is that it’s a bit different from hosting vanilla Minecraft. Mods can completely change the game, but they also add extra steps to the setup and usually need more CPU and RAM to run smoothly.
Whether you’re learning how to self-host a modded Minecraft server on your own PC at home or trying a free host like Aternos, the core idea is similar: you’ll still need the right mod loader, the correct files, and enough resources to keep everything stable.
Understanding Modded Servers
A modded server runs modifications that change gameplay mechanics, add new content, or introduce entirely new systems. Unlike vanilla servers that stick to base game features, modded servers can include anything from simple quality-of-life improvements to complete overhauls that make Minecraft unrecognizable.
The key difference is resource intensity. A vanilla server might run smoothly on 1 GB RAM, while a modded server with 50 mods can easily demand 6 to 8 GB.
Choosing a Mod Loader
Mod loaders act as the foundation that allows mods to function together. The three main options in 2026 are:
Forge remains the most established and widely supported mod loader. Most major modpacks run on Forge, and it handles complex mods well. The downside is higher resource usage compared to alternatives.
Fabric offers a lightweight, modern alternative focused on performance. It’s become increasingly popular for technical mods and performance optimization. However, fewer total mods support Fabric compared to Forge.
NeoForge emerged as a community-driven fork of Forge, maintaining compatibility while improving update speeds and mod development tools.
I’ve run servers on all three. Forge worked best for established modpacks like RLCraft or SkyFactory, while Fabric excelled for performance-focused vanilla-plus experiences.
Installing Mods on Your Server
The installation process varies by mod loader but follows a similar pattern:
- Download your chosen mod loader installer for your Minecraft version
- Run the installer and select “Install Server”
- Point the installer to your server directory
- Download compatible mods from trusted sources like CurseForge or Modrinth
- Place mod files in the “mods” folder created by your mod loader
- Launch the server using the new start script the installer created
Every mod on the server must also be installed client-side by players who want to join. Version mismatches between server and client mods cause connection errors.
Using Pre-Configured Modpacks
Instead of manually selecting individual mods, pre-configured modpacks bundle dozens or hundreds of mods tested for compatibility. Platforms like CurseForge and Technic Launcher host thousands of modpacks.
When I wanted to run a tech-focused server, I used the FTB Academy modpack. The entire installation took 10 minutes because all mod compatibility testing was already completed by the pack creators.
Popular modpacks to consider:
- RLCraft: Hardcore survival with brutal difficulty
- SkyFactory 4: Skyblock automation and progression
- All the Mods 9: Kitchen-sink pack with hundreds of mods
- Vault Hunters: RPG-style dungeon crawling
- Better Minecraft: Enhanced vanilla experience with quality-of-life improvements
Increased Hardware Requirements
Modded servers demand substantially more resources than vanilla:
- Light modpacks (10-20 mods): 3 to 4 GB RAM minimum
- Medium modpacks (40-60 mods): 6 to 8 GB RAM
- Heavy modpacks (100+ mods): 10 to 16 GB RAM or more
CPU requirements also increase. Mods that add new entities, particles, or world generation features can reduce server tick rate, causing lag even with adequate RAM.
When I first tried hosting All the Mods 6 on 4 GB RAM, the server crashed within 10 minutes. Upgrading to 8 GB solved the problem immediately.
Testing Mod Compatibility
Not all mods work well together. Before inviting players to your server:
- Test with one or two people first
- Check logs for error messages
- Verify all mods load correctly during startup
- Ensure players can connect without version mismatches
- Monitor performance under typical player loads
Compatibility issues often don’t appear until specific mod interactions occur. I once spent 3 hours troubleshooting crashes that only happened when players used a specific crafting recipe that triggered a conflict between two mods.
Start with a pre-configured modpack rather than manually selecting individual mods. Platforms like CurseForge and Technic Launcher offer tested modpacks that ensure compatibility, saving you hours of troubleshooting and configuration time.
Hosting Minecraft Bedrock Edition Servers
If you want to know how to host a Minecraft: Bedrock server on your PC, you’ll be glad to know the setup is usually simpler than Java Edition. Bedrock runs on its own dedicated server software (separate from Java), and its biggest perk is smooth cross-platform play, letting players join from PC, console, and mobile. See best Minecraft Bedrock server hosting providers and pick the one for your needs.
Key Differences from Java Edition
Bedrock servers run on C++ compiled code rather than Java, making them significantly more resource-efficient. In many vanilla-ish setups, Bedrock can support a similar player count while using around 20–50% less RAM (sometimes more, but it varies with view/simulation distance, chunk loading, and entity counts).
The trade-off comes in customization. Unlike Java, Bedrock doesn’t use the same open plugin/mod setup, relying instead on add-ons like behavior and resource packs. The Bedrock Marketplace is a major part of how Minecraft makes money, so customization often leans more toward curated content than open modding. Players can download required packs through the server connection flow or install them beforehand, but everyone needs the same packs for the server to work smoothly.
Cross-Platform Compatibility
The biggest advantage of hosting a Minecraft: Bedrock server is seamless cross-platform connectivity. If you’ve ever wondered is Minecraft cross platform, Bedrock Edition provides the answer. Players on:
- Windows 10/11
- Xbox One and Series X/S
- PlayStation 4 and 5
- Nintendo Switch
- iOS and Android devices
- Amazon Fire tablets
All these platforms can connect to the same Bedrock server simultaneously. This makes Bedrock ideal for friend groups spread across different devices.
Bedrock Dedicated Server Software
Mojang provides official Bedrock Dedicated Server (BDS) software for Windows and Ubuntu Linux. Download it from minecraft.net/download/server/bedrock.
The setup process is more straightforward than Java Edition:
- Extract the BDS package to your server directory
- Edit server.properties for basic configuration
- Accept the EULA
- Run the executable file
- Configure port forwarding for port 19132 (Bedrock’s default port, not 25565 like Java)
Bedrock servers lack the extensive configuration options Java servers provide. You can adjust basic settings like difficulty, game mode, and player count, but advanced customization requires third-party tools.
Third-Party Alternatives
PocketMine-MP and Nukkit offer alternatives to BDS with plugin support. These servers attempt to bridge the gap between Bedrock’s simplicity and Java’s customization potential.
However, plugin ecosystems for these platforms remain limited compared to Java. Most server administrators running Bedrock stick with official BDS software for stability.
Performance Advantages
I tested both editions with identical player counts and world sizes. The Bedrock server consistently used 40% less RAM and maintained more stable tick rates. For players hosting on budget hardware or trying to maximize player capacity, Bedrock’s efficiency makes a real difference.
The limitation is the audience. Bedrock lacks the massive mod library Java enjoys, making it less appealing for players who want heavily customized gameplay experiences.
Port Forwarding and Network Configuration
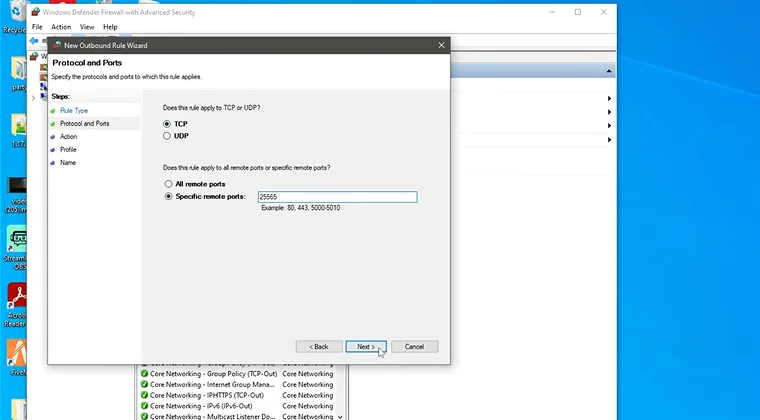
Self-hosted servers require port forwarding to allow external players to connect. This technical step intimidates many players, but the process follows a predictable pattern once you understand it.
Understanding Port Forwarding
Your router acts as a gatekeeper between your home network and the internet. By default, it blocks incoming connections for security. Port forwarding creates a specific tunnel that allows Minecraft traffic through.
Think of it like giving delivery drivers a specific gate code. Without port forwarding, players trying to join your server hit a closed door. With proper configuration, traffic flows directly to your server.
Finding Your Local IP Address
Your server computer needs a static local IP address so port forwarding rules always direct traffic to the correct device.
On Windows:
- Open Command Prompt
- Type “ipconfig”
- Look for “IPv4 Address” under your active network adapter
- Note this address (typically something like 192.168.1.100)
On Mac:
- Open System Settings
- Navigate to Network
- Select your active connection
- Find your IP address in the connection details
On Linux:
- Open Terminal
- Type “ip addr” or “ifconfig”
- Look for your local network IP address
Write this IP address down. You’ll need it for port forwarding configuration.
Accessing Your Router Settings
Most routers use a web interface accessible through your browser:
- Type your router’s IP address in your browser (commonly 192.168.1.1 or 192.168.0.1)
- Enter your router’s admin username and password (check the router label if you haven’t changed default credentials)
- Navigate to the Port Forwarding section (might be under “Advanced Settings,” “NAT,” or “Virtual Servers”)
Every router interface looks different. I’ve configured port forwarding on at least a dozen router models, and no two manufacturers organize their settings identically. Patience helps here.
Configuring Port Forwarding Rules
Create a new port forwarding rule with these settings:
- Service Name: Minecraft (or any name you choose)
- External Port: 25565 (Java Edition) or 19132 (Bedrock Edition)
- Internal Port: Same as external port
- Internal IP Address: Your server computer’s local IP
- Protocol: Java = TCP, Bedrock = UDP (19132/19133) and TCP 19132
Save the rule and restart your router if required.
Testing Your Configuration
Use a port checker tool like yougetsignal.com/tools/open-ports to verify your port is open:
- Enter your public IP address (find it at whatismyip.com)
- Enter port 25565 (or 19132 for Bedrock)
- Click “Check”
If the port shows as open, your configuration worked. If closed, double-check your port forwarding rules and ensure your server is actually running when you test.
Security Considerations
Opening ports creates potential security risks:
- Only open ports you actually need
- Use strong passwords for server administrator accounts
- Keep your server software updated
- Consider whitelist mode for private servers
- Monitor server logs for suspicious connection attempts
I run my home server with whitelist enabled, meaning only players I specifically approve can connect. This prevents random people from finding and joining my server.
Firewall Configuration
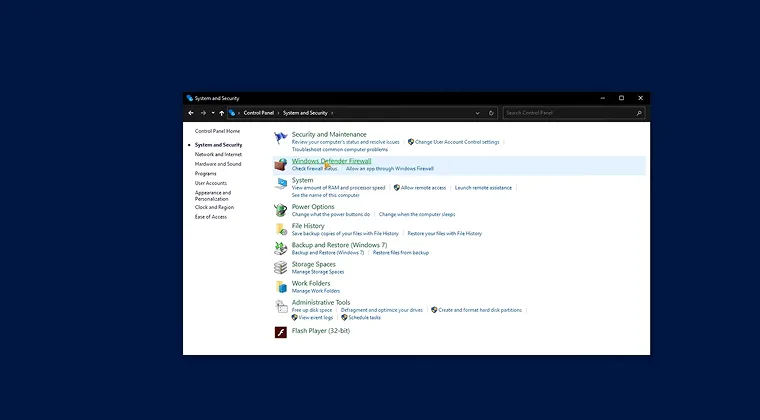
Windows Firewall and other security software might block Minecraft even with proper port forwarding. Create a firewall rule allowing Java (java.exe) or the Bedrock server executable through your firewall.
The exact process varies by operating system, but generally involves:
- Opening Windows Security or your firewall software
- Finding “Allow an app through firewall”
- Adding java.exe or bedrock_server.exe to the allowed apps list
- Ensuring both private and public networks are checked
After 2 hours of troubleshooting connection issues, I discovered Windows Firewall was blocking my server despite correct port forwarding. Adding the firewall exception fixed everything immediately.
Minecraft Java vs Bedrock: Does Hosting Differ?
If you’re deciding how to host a Minecraft server, one of the first choices you’ll face is which edition to run. Java and Bedrock are both great options; but they behave differently under the hood, and that affects your hosting setup.
| Java Edition | Bedrock Edition | |
|---|---|---|
| Platform | PC only | PC, console, mobile |
| Resource Usage | Higher RAM usage | ~20–50% less RAM |
| Mod Support | Full (Forge, Fabric, NeoForge) | Add-ons only |
| Cross-Play | No | Yes |
| Default Port | 25565 (TCP) | 19132 (UDP) |
| Server Software | server.jar (official) | BDS, PocketMine-MP, Nukkit |
| Customisation | Extensive | Limited |
| Best For | Modded servers, PC communities | Mixed-device friend groups |
Choose Java Edition if you want full mod support, a massive plugin ecosystem, and maximum customisation – it’s the go-to for serious server owners.
Choose Bedrock Edition if your group plays across different devices like PC, console, and mobile, or if you’re working with limited hardware and want better performance efficiency.
Most commercial hosting providers support both editions, so whichever you pick, the providers in our comparison table above have you covered.
Our Top Picks for the Best Minecraft Server Hosting
After testing performance, support quality, and value across multiple providers, three platforms consistently delivered the smoothest experience for different needs:
Godlike.Host (Best Overall) offers a strong balance of modern hardware, easy management, and modpack support, with Ryzen 9 9950X3D processors and pricing starting at $3.99/mo for 2GB. Their Godlike Panel supports one-click modpack installation, automated backups, and server management tools. DDoS protection, 99.9% uptime, and a free plan make Godlike.Host a strong choice for players wanting reliable performance and an easy setup for modded Minecraft.
Hostinger (Best for Modded Minecraft) offers the best overall balance of performance and affordability, with full VPS control and 99.9% uptime starting at $5.49/mo on a 24-month term (paid upfront). Their game panel includes an AI assistant called Kodee that helps with common configuration questions. Automated backups, DDoS protection, and one-click mod installation make Hostinger ideal for players wanting reliability without breaking the bank.

Shockbyte (Best Budget) provides exceptional budget value with unlimited slots and solid hardware at just $2.99 per month for entry-level plans. While not the most powerful option for extremely mod-heavy servers, Shockbyte offers dependable performance for casual gameplay and small communities. Perfect for friend groups testing server hosting for the first time without significant financial commitment.

ScalaCube (Best for Beginners) delivers a beginner-friendly setup with one-click modpack installation and comprehensive support starting at $2 per month. The control panel is intuitive, making server management accessible even for players with no prior hosting experience. Excellent for players who want simplicity without sacrificing performance or support quality.

Here’s how the three stack up at a glance, so you can pick the one that fits your setup without reading every spec twice.
| Provider | Starting Price | Best For | Key Features |
|---|---|---|---|
| Godlike.Host | $3.99/month | Overall value & performance | Ryzen 9 9950X3D, one-click modpacks, automatic backups, DDoS protection |
| Hostinger | $5.49/month | Modded Minecraft & performance | AI assistant, full VPS control, 99.9% uptime |
| Shockbyte | $2.99/month | Budget-conscious players | Unlimited slots, instant setup, affordable |
| ScalaCube | $2.00/month | First-time server owners | One-click modpacks, beginner-friendly panel |
Best Commercial Minecraft Server Hosting Providers (Compared)
If you’re ready to host a Minecraft server on a paid plan, picking a commercial host comes down to four things: starting price, how many players you’re supporting, whether you need Java, Bedrock, or both, and whether a free trial is on the table. The comparison below covers six providers across all four of those factors, so you can filter quickly instead of digging through pricing pages.
| Provider | Starting Price | Max Players | Java/Bedrock | Free Trial |
|---|---|---|---|---|
| Godlike.Host | $3.99/mo | Unlimited slots (paid plans) | Both | Free plan + 3-day money-back |
| Hostinger | $5.49/mo | Scales with plan | Both | No (money-back guarantee) |
| Shockbyte | $2.99/mo | Unlimited slots | Both | 72-hour money-back |
| ScalaCube | $2.00/mo | 10 (entry plan) | Both | 1-player free plan |
| Nitrado | $5.50/mo | 10 slots (entry plan) | Both | No (prepaid credits) |
| PingPerfect | From ~$10/mo (RAM-based) | Unlimited slots | Both | 48-hour free trial |
All six are reliable ways to host a Minecraft server without the technical headaches of self-hosting. Every provider above handles a different kind of player. The ways to host a Minecraft server range from a $2 beginner plan to a full VPS with automated backups, and knowing which tier you actually need comes down to a few key factors. Before you commit to a plan, here’s how the pricing really breaks down.
Understanding Hosting Costs
How much does it cost to host a Minecraft server depends entirely on your requirements:
- Budget hosting ($2-5/month): Basic vanilla servers with 10-20 player capacity
- Mid-range hosting ($6-15/month): Modded servers or larger vanilla communities
- Premium hosting ($20-50/month): Heavy modpacks, large player counts, maximum performance
- Dedicated servers ($60-200+/month): Maximum control and resources for serious communities
The initial low prices often exclude add-ons like automatic backups, additional storage, or premium support. Calculate total costs including any extras you’ll actually use. If you’re planning to offset those costs over time, our guide on how Minecraft servers make money covers donation systems, cosmetic ranks, and other approaches server owners rely on.
Server Maintenance and Management
Hosting a server isn’t a set-it-and-forget-it task. Ongoing maintenance keeps your world safe and performance optimal.
Regular Backups
World corruption happens. Hardware fails. Players accidentally delete important builds. Backups are your insurance policy against data loss.
Manual backup process:
- Stop your server
- Copy the entire world folder to a safe location
- Restart the server
For automated backups:
- Commercial hosts usually include scheduled backups in control panels
- Self-hosted servers can automate backups with scheduled scripts or dedicated backup tools/plugins
- Store backups on separate drives or cloud storage
I learned this lesson the hard way when a power outage corrupted our world file. Thankfully, I had a backup from the previous day and only lost 6 hours of progress instead of 6 months.
Software Updates
Minecraft releases updates regularly. Keeping your server current ensures:
- Security patches protect against exploits
- New features become available to players
- Compatibility with updated client versions
Before updating:
- Create a full backup
- Check if installed mods/plugins support the new version
- Test the update on a separate server if possible
- Read update changelogs for breaking changes
Major version updates (like 1.20 to 1.21) often break mod compatibility. Plan for downtime while mod developers update their work.
Player Management
As your community grows, management tools become essential:
Whitelisting restricts server access to approved players only. Enable it through server.properties or control panel settings.
Operator permissions grant administrative powers. Use them carefully and only for trusted players.
Ban systems remove problem players. Most server software includes built-in ban commands, or you can use plugins for more sophisticated moderation.
Performance Monitoring
Watch server health metrics:
- TPS (ticks per second): Should stay at 20 for smooth gameplay
- Memory usage: Shouldn’t consistently hit maximum allocation
- Player ping: High ping indicates connection or performance issues
When TPS drops below 18, players experience noticeable lag. Common causes include:
- Too many entities (mobs, items, armor stands)
- Excessive redstone contraptions
- Insufficient RAM allocation
- Chunk loading from rapid exploration
Community Management
Technical stability matters less than community health. Foster positive interactions by:
- Establishing clear server rules
- Responding to player concerns quickly
- Organizing community events
- Recognizing and rewarding positive contributions
Our server grew from 5 to 30 active players once we started hosting weekly build competitions. Once your community reaches that scale, it’s worth exploring making money in Minecraft – larger public servers regularly turn active player bases into a sustainable side income.
Troubleshooting Common Server Hosting Issues
Even well-configured servers encounter problems. Understanding common issues and solutions saves hours of frustration.
Connection Issues
“Can’t connect to server” errors stem from several sources:
Port forwarding misconfiguration:
- Verify port rules match your server setup
- Confirm your internal IP address hasn’t changed
- Check that your server is actually running when testing
Firewall blocking:
- Add java.exe to Windows Firewall exceptions
- Disable antivirus temporarily to test if it’s blocking connections
- Verify router firewall settings aren’t too restrictive
Version mismatches:
- Ensure player client versions match your server version
- Check that modded servers and clients have identical mod lists
When friends couldn’t connect to my server despite correct port forwarding, I discovered my ISP used CGNAT (Carrier-Grade NAT) which blocks hosting entirely. Some internet connections simply can’t host servers due to ISP restrictions.
Lag and Performance Problems
Server lag manifests as:
- Delayed block breaking/placing
- Entity rubber-banding
- Slow chunk loading
- TPS drops below 20
Solutions vary by cause:
Insufficient RAM: Increase allocation in your startup command or hosting control panel
Too many entities: Use plugins like ClearLag to remove excess items and mobs
Chunk loading: Pre-generate your world to reduce on-the-fly generation lag
Heavy redstone: Limit complex contraptions or spread them across different chunks
View distance: Reduce from 10 to 8 or 6 chunks
I cut our server’s RAM usage by 30% simply by reducing view distance from 10 to 7 chunks. Players barely noticed the difference but performance improved dramatically.
Port Forwarding Failures
Even correct configuration sometimes fails:
Double NAT situations: Some networks route through multiple routers, requiring port forwarding on each one
CGNAT restrictions: Internet service providers using CGNAT prevent hosting entirely
Dynamic IP changes: Your public IP might change, breaking previous port forwarding
UPnP conflicts: Universal Plug and Play might interfere with manual port forwarding
Solutions include:
- Enabling UPnP in router settings (less secure but easier)
- Setting up DDNS (Dynamic DNS) to track IP changes
- Using VPN services designed for gaming
- Switching to commercial hosting to bypass these issues entirely
Mod Compatibility Errors
Modded servers generate unique problems:
Missing mods: Players get kicked if they lack required mods Version mismatches: Even minor version differences cause connection failures Conflicting mods: Some mods override similar features causing crashes
Check server logs for error messages. They typically identify which mods are causing issues. The console output during server startup reveals most compatibility problems.
Server Crashes
Crash causes include:
- Memory overflow from insufficient RAM
- Corrupt chunks in the world file
- Conflicting mods or plugins
- Outdated Java version
- Hardware failures
The crash log file contains detailed error information. Search for the specific error message online, as thousands of players have likely encountered and solved the same issue.
When our server crashed every 20 minutes, the logs revealed a corrupt chunk. Using MCEdit to delete that specific chunk solved the problem.
Conclusion
Hosting your own Minecraft server opens up multiplayer possibilities that default realms can’t match. In this guide on how to host a Minecraft server, we’ve covered the main routes – from running it on your own PC to using free hosts or paid providers, plus specialized setups for modded servers.
The best hosting method depends on your individual needs, budget, and technical comfort level. Self-hosting works perfectly for tech-savvy players with stable internet and spare computing power. Free services provide excellent testing grounds for new server administrators. Commercial hosting delivers reliability and support that makes sense for serious communities.
Start with the approach that best fits your situation and scale up as your community grows. A small server today can become a thriving community tomorrow with the right foundation.
Whether you’re running vanilla survival with a few friends or managing a 50-player modded server, the tools and knowledge exist to make it happen. The technical barriers that once seemed insurmountable become routine with experience.
My own journey started with a laggy free server, moved through self-hosting challenges, and eventually settled on commercial hosting as our community expanded. Each step taught valuable lessons about server management, community building, and technical problem-solving.
The rewarding experience of hosting a multiplayer Minecraft community makes every troubleshooting session worthwhile. There’s something special about building a world where friends gather, memories form, and creativity flourishes. If you’re looking for other multiplayer experiences to explore with your community, our guide on games like Minecraft offers excellent alternatives that might interest your group.
GAMES LIKE MINECRAFT
FAQs
Free options like Aternos cost nothing but have performance limits. Paid Minecraft server hosting starts at around $2.00–$5/month for basic servers, with modded or larger setups running $6–$15+ monthly.
A vanilla Minecraft server for 5–10 players needs 1–2 GB RAM, a 2 GHz+ CPU, 5 GB storage, and 10+ Mbps upload speed. Modded servers need 4–8 GB RAM depending on modpack size.
Install a mod loader like Forge or Fabric on your server, place compatible mods in the mods folder, and have all players install matching client-side mods. Pre-built packs from CurseForge make this much faster.
There’s no official free version of Minecraft – but you can get it at the best price on Eneba. Once you own the game, hosting a free server via Aternos or Minehut costs nothing extra.
Aternos is the most popular free option with mod support and unlimited players. Minehut is great for small groups – and Server.pro works well for beginners testing the waters.
Java offers full mod support but uses more RAM. Bedrock uses 20–50% less RAM and supports cross-play across PC, console, and mobile – but has limited customisation.
Most free hosts cap performance at 3–10 active players. Aternos technically allows more, but lags heavily beyond that – paid hosting is recommended for groups larger than 10.